Author: Diana

  • Garlic Butter Meatballs over Creamy Parmesan Linguine

    Garlic Butter Meatballs over Creamy Parmesan Linguine

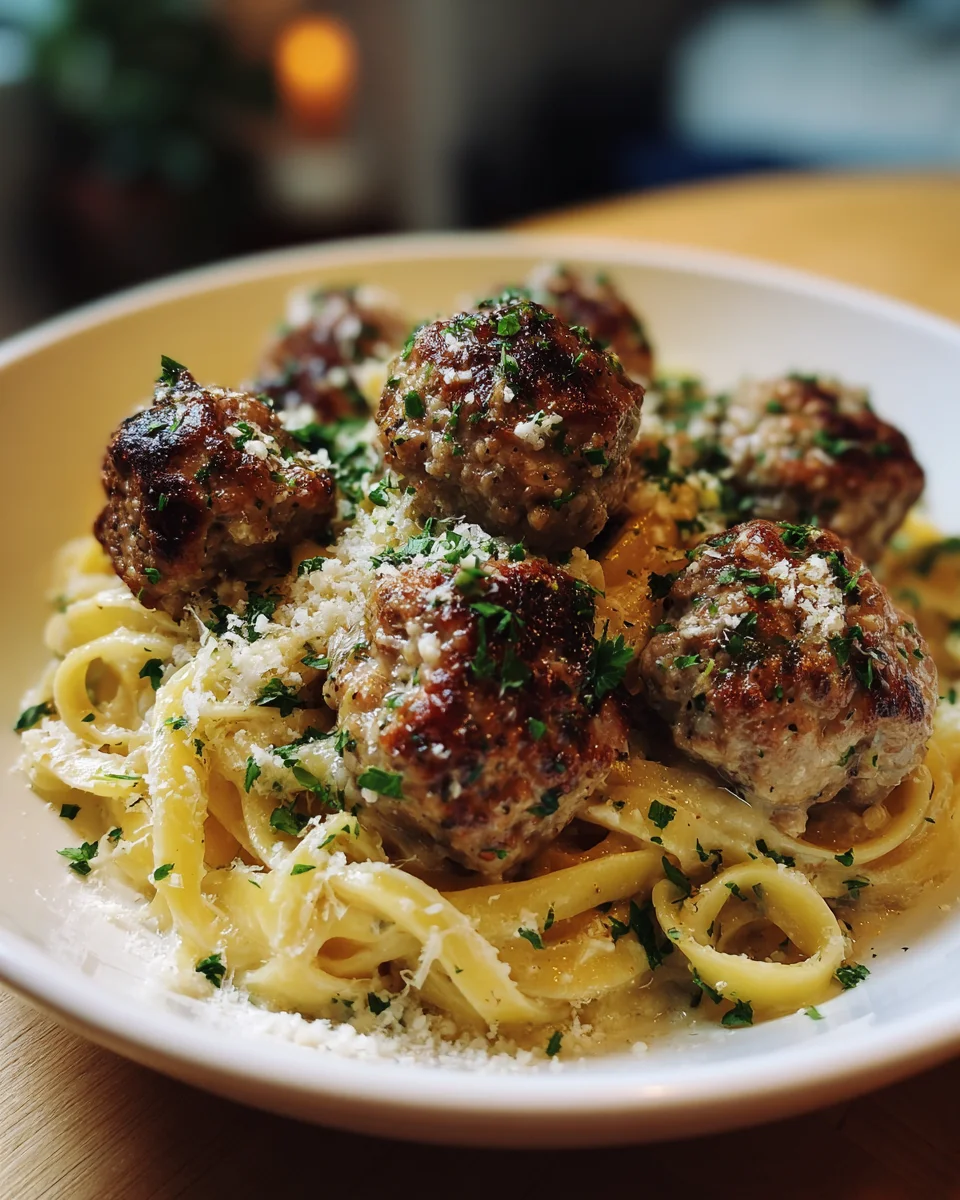
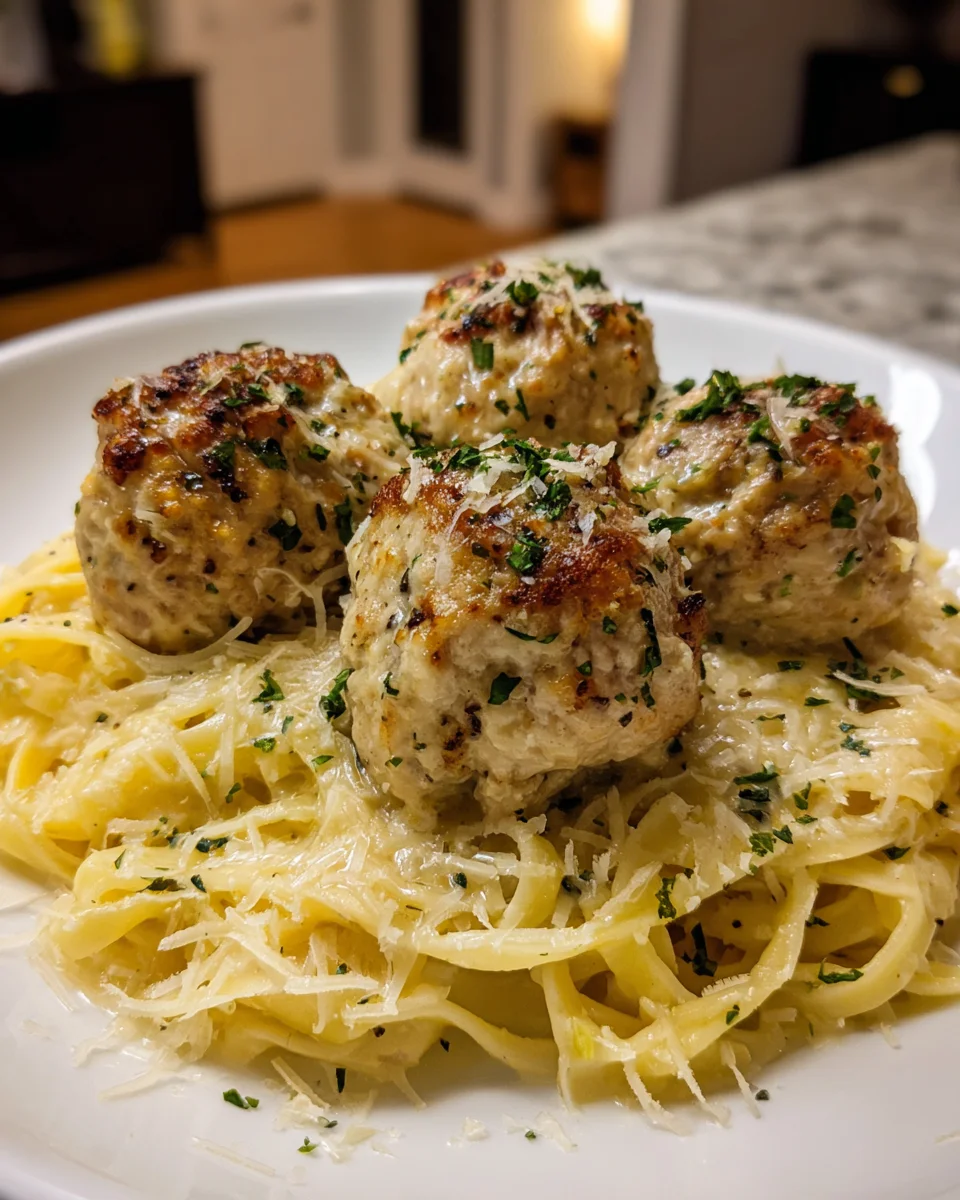
    Garlic Butter Meatballs over Creamy Parmesan Linguine is a delightful dish that combines savory meatballs with a rich, creamy sauce. This recipe is perfect for family dinners or casual gatherings, showcasing a wonderful blend of flavors that will satisfy any palate. The standout qualities include tender meatballs in a luscious garlic butter sauce served over al dente linguine, making it a comforting meal suitable for any occasion.

    Why You’ll Love This Recipe

    • Easy to make: With simple ingredients and straightforward steps, you can whip up this delicious meal in no time.
    • Flavor-packed: The combination of garlic butter and creamy Parmesan brings out the best in each ingredient.
    • Versatile: Perfect for weeknight dinners or special occasions, it can be paired with various sides.
    • Kid-friendly: The mild flavors and fun meatballs are sure to please even the pickiest eaters.
    • Comfort food classic: This dish embodies all the warmth and heartiness of traditional comfort food.

    Tools and Preparation

    To prepare Garlic Butter Meatballs over Creamy Parmesan Linguine, you’ll need some essential tools that make cooking easier and more efficient.

    Essential Tools and Equipment

    • Large mixing bowl
    • Baking sheet
    • Skillet
    • Measuring cups and spoons
    • Pasta pot

    Importance of Each Tool

    • Large mixing bowl: Helps combine ingredients for the meatballs properly without spilling.
    • Skillet: Essential for sautéing meatballs to achieve that perfect golden-brown color.
    • Pasta pot: Designed to boil linguine evenly, ensuring it’s cooked to perfection every time.

    Ingredients

    For the Meatballs

    • 1 pound ground turkey
    • 1/2 cup breadcrumbs
    • 1/4 cup grated Parmesan cheese
    • 1 large egg
    • 4 cloves garlic, minced
    • 1 teaspoon dried oregano
    • Salt and black pepper to taste

    For the Garlic Butter Sauce

    • 6 tablespoons unsalted butter
    • 6 cloves garlic, minced
    • 1/2 teaspoon red pepper flakes (optional)
    • 1 cup chicken broth

    For the Creamy Parmesan Linguine

    • 8 ounces linguine pasta
    • 1 cup heavy cream
    • 1/2 cup grated Parmesan cheese
    • Salt and black pepper to taste
    Garlic

    How to Make Garlic Butter Meatballs over Creamy Parmesan Linguine

    Step 1: Prepare the Meatballs

    1. In a large mixing bowl, combine 1 pound of ground turkey, 1/2 cup of breadcrumbs, 1/4 cup of grated Parmesan cheese, 1 large egg, 4 cloves of minced garlic, 1 teaspoon of dried oregano, and salt and black pepper to taste.
    2. Mix all ingredients until well combined.
    3. Form mixture into small meatballs (about 1 inch in diameter) and place them on a baking sheet.

    Step 2: Cook the Meatballs

    1. Preheat your skillet over medium heat with a drizzle of olive oil.
    2. Add the meatballs in batches without overcrowding the pan.
    3. Cook for about 5-7 minutes on each side until golden brown and cooked through. Remove from skillet and set aside.

    Step 3: Make the Garlic Butter Sauce

    1. In the same skillet, melt 6 tablespoons of unsalted butter over medium heat.
    2. Add 6 cloves of minced garlic and sauté until fragrant (about 30 seconds).
    3. Stir in optional red pepper flakes and then pour in 1 cup of chicken broth; bring it to a simmer.

    Step 4: Prepare the Linguine

    1. In a large pot filled with salted water, cook 8 ounces of linguine according to package directions until al dente.
    2. Drain the pasta but reserve about 1/2 cup of pasta water.

    Step 5: Combine Everything

    1. Reduce heat under skillet with garlic butter sauce; stir in heavy cream (1 cup) and grated Parmesan cheese (1/2 cup), mixing until smooth.
    2. Add cooked meatballs back into the sauce along with drained linguine; toss everything together gently.
    3. If needed, add reserved pasta water until desired consistency is reached; season with salt and black pepper to taste before serving.

    How to Serve Garlic Butter Meatballs over Creamy Parmesan Linguine

    Serving Garlic Butter Meatballs over Creamy Parmesan Linguine can elevate your dining experience. This dish is not only flavorful but also visually appealing. Here are some creative serving suggestions to make your meal unforgettable.
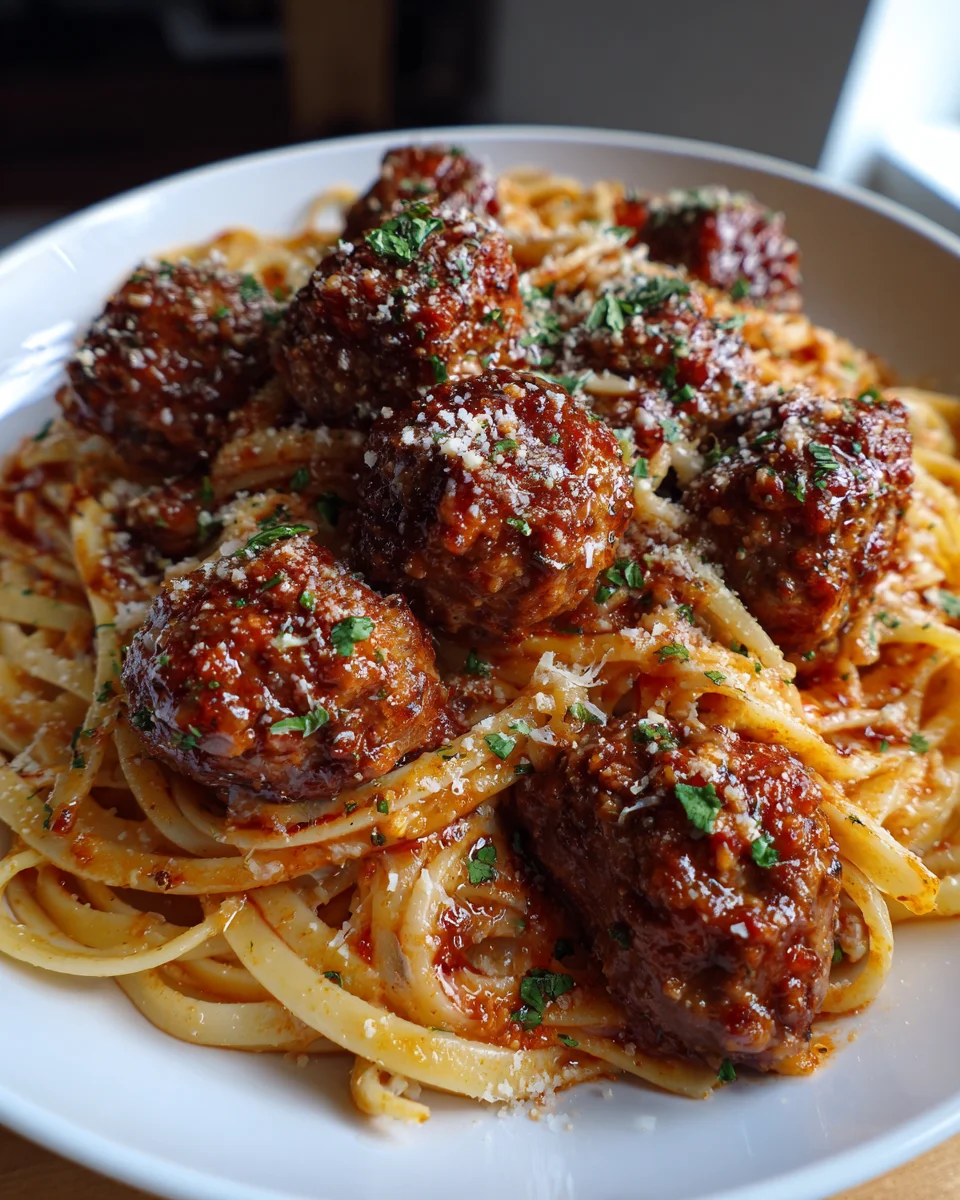
    Family Style

    • Serve the meatballs in a large bowl, topped with extra garlic butter sauce, allowing everyone to help themselves to the creamy linguine underneath.
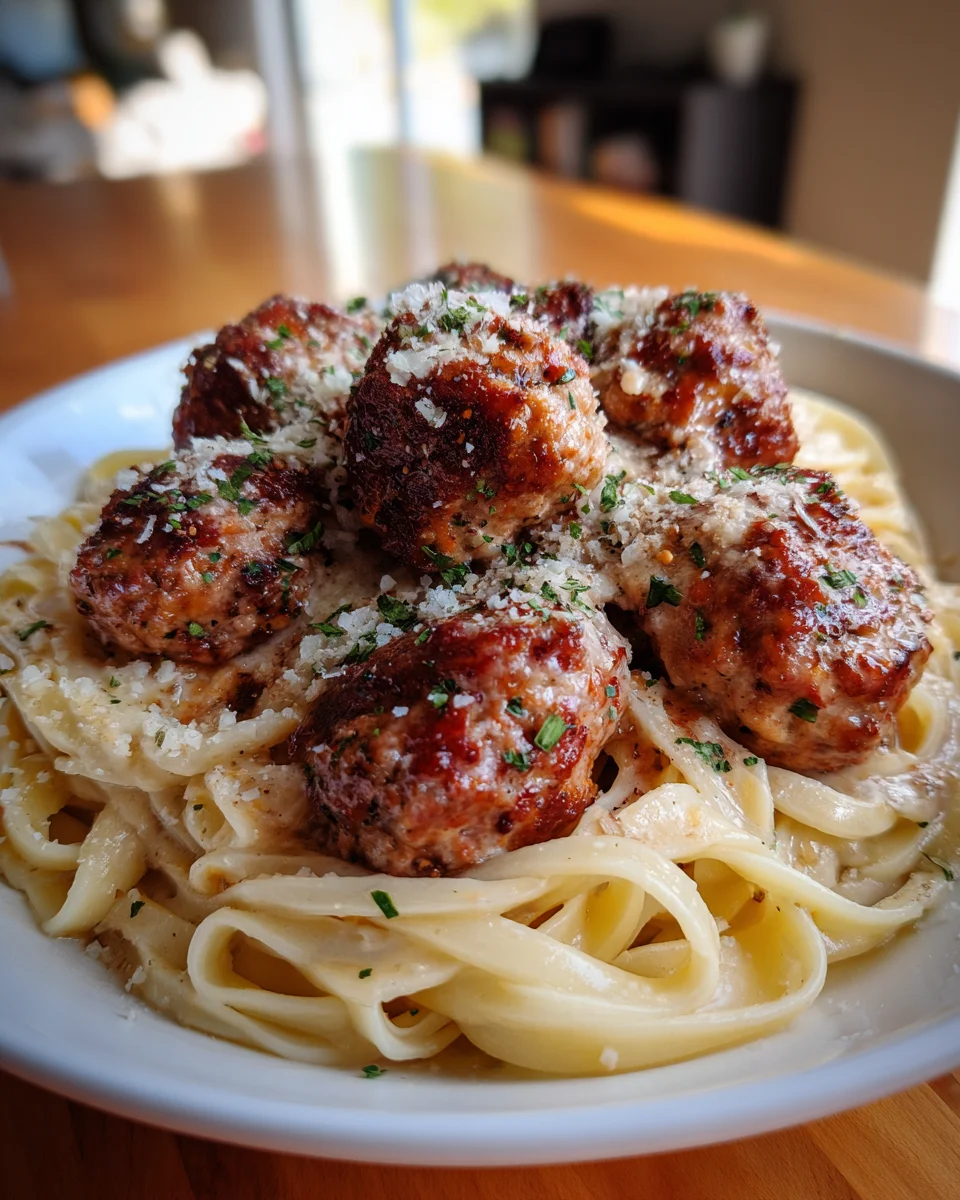
    Individual Plates

    • Plate each portion of linguine and top it with three meatballs. Drizzle with additional garlic butter and sprinkle with freshly grated Parmesan for a restaurant-like presentation.

    Garnish with Fresh Herbs

    • Add a sprinkle of chopped parsley or basil on top of the meatballs for a fresh touch. This adds color and enhances the flavor profile.

    Pair with Garlic Bread

    • Serve alongside warm garlic bread for dipping. Spread 4 tablespoons of softened butter mixed with minced garlic on slices of baguette, then toast them until golden brown.

    Include a Side Salad

    • A simple mixed green salad can balance the richness of the dish. Use 4 cups of mixed greens tossed with olive oil and balsamic vinegar for a light side.

    How to Perfect Garlic Butter Meatballs over Creamy Parmesan Linguine

    Perfecting this dish involves attention to detail and quality ingredients. Here are some tips to ensure your meal shines.

    • Use fresh herbs: Incorporate 1 tablespoon of fresh chopped parsley into the meatball mixture for added flavor.
    • Don’t overcrowd your pan: When cooking meatballs, leave space between them in the pan. This ensures they brown evenly; ideally, cook them in batches.
    • Choose high-quality pasta: Opt for 8 ounces of linguine made from durum wheat for better texture and taste.
    • Adjust seasoning: Taste your garlic butter sauce before serving and adjust salt and pepper as needed; start with 1 teaspoon each and add more if necessary.
    • Let sauce thicken naturally: Simmer the garlic butter sauce for at least 5 minutes before adding meatballs so that it thickens properly.
    • Add a splash of lemon juice: Squeeze half a lemon over the finished dish for brightness; this complements the rich flavors beautifully.
    Garlic

    Best Side Dishes for Garlic Butter Meatballs over Creamy Parmesan Linguine

    Complementing your Garlic Butter Meatballs over Creamy Parmesan Linguine with sides can enhance the meal’s overall experience. Here are some great options:

    1. Steamed Broccoli: Lightly steam 2 cups of broccoli florets until bright green and tender, offering a nutritious contrast.
    2. Roasted Vegetables: Toss 2 cups of seasonal vegetables like zucchini, bell peppers, and carrots in olive oil, salt, and pepper, then roast until caramelized.
    3. Caesar Salad: Mix romaine lettuce, croutons, and Caesar dressing for a crispy side that pairs well with creamy dishes.
    4. Garlic Mashed Potatoes: Prepare creamy mashed potatoes using 2 pounds of Yukon Gold potatoes mixed with 4 cloves of roasted garlic for an indulgent side.
    5. Grilled Asparagus: Drizzle olive oil on 1 pound of asparagus spears, grill until tender-crisp, adding a squeeze of lemon juice before serving.
    6. Caprese Skewers: Assemble skewers using cherry tomatoes, mozzarella balls, and basil leaves drizzled with balsamic glaze for a refreshing starter.

    Common Mistakes to Avoid

    When making Garlic Butter Meatballs over Creamy Parmesan Linguine, it’s easy to make some common mistakes. Here are a few to watch out for:

    • Using stale bread crumbs – Fresh bread crumbs provide better texture and flavor. Use 1 cup of fresh or homemade bread crumbs instead.
    • Overcooking the meatballs – Cook until they reach an internal temperature of 160°F (71°C). This keeps them juicy and tender.
    • Not measuring the garlic – Using too much garlic can overpower the dish. Limit to 4 cloves for balanced flavor.
    • Skipping the pasta water – Reserve at least 1 cup of pasta water to adjust sauce consistency. Don’t forget this step!
    • Neglecting seasoning – Under-seasoning can lead to bland flavors. Ensure you season each component adequately, like using 1 teaspoon of salt in the pasta water.

    Storage & Reheating Instructions

    Refrigerator Storage

    • Store in an airtight container.
    • Keep in the refrigerator for up to 3 days.
    • Allow the dish to cool before sealing.

    Freezing Garlic Butter Meatballs over Creamy Parmesan Linguine

    • Place in a freezer-safe container.
    • Can be frozen for up to 3 months.
    • Consider separating meatballs and linguine for better texture upon reheating.

    Reheating Garlic Butter Meatballs over Creamy Parmesan Linguine

    • Oven – Preheat to 350°F (175°C) and bake for about 20 minutes until heated through. Cover with foil to retain moisture.
    • Microwave – Use a microwave-safe dish, cover loosely, and heat in 1-minute intervals until warm, stirring occasionally.
    • Stovetop – Heat on low in a non-stick skillet, adding reserved pasta water as needed until warmed through.
    Garlic

    Frequently Asked Questions

    What are Garlic Butter Meatballs over Creamy Parmesan Linguine?

    Garlic Butter Meatballs over Creamy Parmesan Linguine is a delicious dish featuring tender meatballs cooked in garlic butter, served over creamy linguine pasta.

    Can I use different types of pasta?

    Yes! While linguine works best, you can substitute it with spaghetti or fettuccine if desired.

    How do I make the meatballs more flavorful?

    Incorporate herbs such as parsley or oregano into your meatball mixture. Using 1 tablespoon of each will enhance their taste significantly.

    Can I customize the sauce?

    Absolutely! Feel free to add vegetables like spinach or sun-dried tomatoes for extra flavor and nutrition while keeping the same creamy base.

    What can I serve with this dish?

    Serve with a side salad or garlic bread for a complete meal. Pairing with a light white wine also complements the flavors nicely.

    Final Thoughts

    Garlic Butter Meatballs over Creamy Parmesan Linguine is not only rich and flavorful but also versatile enough for any occasion. You can easily customize it by adding vegetables or adjusting seasonings according to your taste preferences. Give this recipe a try; it’s sure to impress family and friends!

    Print

    Garlic Butter Meatballs over Creamy Parmesan Linguine

    5 Stars 4 Stars 3 Stars 2 Stars 1 Star

    No reviews

    Garlic Butter Meatballs over Creamy Parmesan Linguine is a delightful dish that brings together tender, savory meatballs and a rich garlic butter sauce, served atop al dente linguine. Perfect for family dinners or casual gatherings, this meal is sure to impress with its comforting flavors and creamy texture.

    • Author: Diana
    • Prep Time: 15 minutes
    • Cook Time: 25 minutes
    • Total Time: 40 minutes
    • Yield: Serves approximately 4 people 1x
    • Category: Main
    • Method: Skillet
    • Cuisine: Italian

    Ingredients

    Scale
    • 1 pound ground turkey
    • 1/2 cup breadcrumbs
    • 1/4 cup grated Parmesan cheese
    • 1 large egg
    • 4 cloves garlic, minced
    • 1 teaspoon dried oregano
    • Salt and black pepper to taste
    • 6 tablespoons unsalted butter
    • 6 cloves garlic, minced
    • 1/2 teaspoon red pepper flakes (optional)
    • 1 cup chicken broth
    • 8 ounces linguine pasta
    • 1 cup heavy cream
    • 1/2 cup grated Parmesan cheese

    Instructions

    1. In a large mixing bowl, combine ground turkey, breadcrumbs, Parmesan cheese, egg, minced garlic (4 cloves), oregano, salt, and pepper. Mix until well combined. Form into meatballs (about 1 inch in diameter).
    2. Heat olive oil in a skillet over medium heat. Cook meatballs until golden brown on all sides (about 5-7 minutes). Remove from skillet and set aside.
    3. In the same skillet, melt butter over medium heat. Add minced garlic (6 cloves) and sauté until fragrant (about 30 seconds). Stir in optional red pepper flakes and chicken broth; bring to a simmer.
    4. In a large pot of salted boiling water, cook linguine until al dente (about 8-10 minutes). Drain pasta but reserve about 1/2 cup of pasta water.
    5. Reduce heat under the skillet; stir in heavy cream and grated Parmesan cheese until smooth. Add meatballs back into the sauce along with drained linguine; toss gently to combine. Adjust consistency with reserved pasta water if needed.

    Nutrition

    • Serving Size: 1 plate (approximately 350g)
    • Calories: 590
    • Sugar: 3g
    • Sodium: 920mg
    • Fat: 34g
    • Saturated Fat: 20g
    • Unsaturated Fat: 10g
    • Trans Fat: 0g
    • Carbohydrates: 45g
    • Fiber: 3g
    • Protein: 28g
    • Cholesterol: 120mg

    Did you make this recipe?

    Share a photo and tag us — we can’t wait to see what you’ve made!

  • Korean Cream Cheese Garlic Bread

    Korean Cream Cheese Garlic Bread

    Korean Cream Cheese Garlic Bread is an irresistible treat that perfectly balances sweet and savory flavors. This fluffy, cheesy delight is ideal for gatherings, movie nights, or as a comforting snack. The creamy filling combined with a crispy exterior makes it a standout dish that will impress your family and friends.

    Why You’ll Love This Recipe

    • Delicious Flavor Combo: The blend of cream cheese and garlic creates a rich taste that is hard to resist.
    • Easy to Make: With simple steps and minimal prep time, you’ll have this tasty bread ready in no time.
    • Versatile Treat: Perfect as an appetizer, side dish, or snack at any occasion.
    • Crowd-Pleaser: This dish appeals to both kids and adults, making it great for family gatherings or parties.
    • Customizable Filling: Feel free to add herbs or spices according to your taste preferences!

    Tools and Preparation

    To make Korean Cream Cheese Garlic Bread, you’ll need a few essential tools to ensure everything goes smoothly.

    Essential Tools and Equipment

    • Mixing bowl
    • Baking sheet
    • Parchment paper
    • Knife
    • Spatula

    Importance of Each Tool

    • Mixing bowl: Essential for combining the cream cheese filling and ensuring even mixing of ingredients.
    • Baking sheet: Provides a sturdy surface for baking the bread evenly without burning.
    • Parchment paper: Prevents sticking and makes cleanup easier after baking.

    Ingredients

    For the Dough

    • 3 cups all-purpose flour
    • 1 tablespoon sugar
    • 1 teaspoon salt
    • 2 teaspoons instant yeast
    • 1 cup warm water (about 110°F)
    • 2 tablespoons vegetable oil

    For the Cream Cheese Filling

    • 200g cream cheese, softened
    • 4 tablespoons unsalted butter, softened
    • 6 garlic cloves, minced
    • 2 tablespoons fresh parsley, chopped (or 1 tablespoon dried parsley)
    • Salt to taste

    To Top the Bread

    • 2 tablespoons unsalted butter, melted
    • 1 tablespoon sesame seeds (optional)
    Korean

    How to Make Korean Cream Cheese Garlic Bread

    Step 1: Prepare the Dough

    1. In a mixing bowl, combine 3 cups all-purpose flour, 1 tablespoon sugar, and 1 teaspoon salt. Mix well.
    2. In another bowl, dissolve 2 teaspoons instant yeast in 1 cup warm water. Let it sit for about 5 minutes until frothy.
    3. Add the yeast mixture and 2 tablespoons vegetable oil into the dry ingredients. Stir until a dough forms.
    4. Knead on a floured surface for about 10 minutes until smooth and elastic.

    Step 2: Let the Dough Rise

    1. Place the kneaded dough in a greased mixing bowl. Cover with plastic wrap or a damp cloth.
    2. Let it rise in a warm place for about 1 hour or until doubled in size.

    Step 3: Make the Cream Cheese Filling

    1. In a mixing bowl, combine 200g softened cream cheese, 4 tablespoons softened butter, and 6 minced garlic cloves. Mix until smooth.
    2. Add in the chopped parsley and salt to taste. Stir well to incorporate.

    Step 4: Assemble the Bread

    1. Preheat your oven to 375°F (190°C).
    2. Once the dough has risen, punch it down and divide it into equal portions (about 8 pieces).
    3. Take one piece of dough and flatten it out into a circle about 5 inches wide.
    4. Place about 1 tablespoon of the cream cheese filling in the center of each circle.
    5. Gather the edges of the dough around the filling and pinch them together to seal.

    Step 5: Bake

    1. Arrange sealed dough balls on a lined baking sheet. Brush with melted butter (2 tablespoons) and sprinkle sesame seeds on top if desired.
    2. Bake in preheated oven for about 20-25 minutes or until golden brown.

    Enjoy your delicious Korean Cream Cheese Garlic Bread warm!

    How to Serve Korean Cream Cheese Garlic Bread

    Korean Cream Cheese Garlic Bread is a delightful treat that pairs well with various dishes and drinks. Here are some serving suggestions to enhance your dining experience.

    Pair with Coffee

    • Espresso: The strong flavor of espresso complements the sweetness of the bread.
    • Cappuccino: The creamy texture balances the garlic’s richness.

    Serve as an Appetizer

    • Cheese Platter: Arrange various cheeses alongside for a savory contrast.
    • Vegetable Crudités: Fresh veggies add a crunchy element, perfect for dipping in cream cheese.

    Enjoy with Salads

    • Caesar Salad: The garlicky notes in the bread pair nicely with the creamy dressing.
    • Greek Salad: The refreshing flavors of cucumber and feta complement the bread’s richness.

    How to Perfect Korean Cream Cheese Garlic Bread

    To achieve the best results when making Korean Cream Cheese Garlic Bread, consider these helpful tips.

    • Use fresh ingredients: Always opt for fresh garlic (about 3-4 cloves) to ensure a robust flavor.
    • Adjust cream cheese consistency: Soften 8 oz of cream cheese at room temperature for easy spreading.
    • Add herbs for flavor: Incorporate 1 tablespoon of chopped parsley or chives for extra freshness.
    • Control oven temperature: Bake at 375°F (190°C) to get a perfectly crispy exterior without burning.
    • Experiment with toppings: Try adding a sprinkle of chili flakes (1 teaspoon) for a spicy kick.
    Korean

    Best Side Dishes for Korean Cream Cheese Garlic Bread

    Korean Cream Cheese Garlic Bread can be complemented by several side dishes that will enhance its flavors. Here are some great options to serve alongside.

    1. Kimchi Fried Rice: This flavorful dish adds a spicy kick, balancing the richness of the bread.
    2. Miso Soup: A warm bowl provides a comforting touch, making it an excellent pairing.
    3. Grilled Vegetables: Seasonal veggies grilled with olive oil (2 tablespoons) add color and nutrition.
    4. Spicy Tofu Stir-Fry: Tofu cooked in chili sauce offers protein and heat to your meal.
    5. Seaweed Salad: The lightness of seaweed salad contrasts nicely with the heaviness of the bread.
    6. Pickled Radishes: These add a tangy crunch that brightens up each bite.

    Common Mistakes to Avoid

    Making Korean Cream Cheese Garlic Bread can be simple, but it’s easy to make mistakes that ruin the dish’s flavor and texture. Here are some common pitfalls to avoid:

    • Using stale bread – Always use fresh bread for the best texture and taste. Stale bread won’t hold the creamy filling well.
    • Overloading with garlic – Stick to 4 cloves of minced garlic. Using more can overpower the dish and make it too pungent.
    • Not measuring cream cheese – Use exactly 8 ounces of cream cheese. Too much or too little can affect the consistency of your filling.
    • Ignoring baking time – Bake for 15-20 minutes. Overbaking will dry out the bread, while underbaking leaves it doughy.
    • Skipping the herbs – Don’t forget to add 1 tablespoon of chopped parsley or chives. This adds a pop of flavor that balances the richness.

    Storage & Reheating Instructions

    Refrigerator Storage

    • Store in an airtight container.
    • Keep in the refrigerator for up to 3 days.

    Freezing Korean Cream Cheese Garlic Bread

    • Wrap individual pieces tightly in plastic wrap.
    • Place them in a freezer-safe bag or container.
    • Can be frozen for up to 3 months.

    Reheating Korean Cream Cheese Garlic Bread

    • Oven – Preheat to 350°F (175°C). Bake for about 10 minutes until warmed through.
    • Microwave – Heat on medium power for about 30 seconds per piece. Be cautious not to overheat, as this can make it chewy.
    • Stovetop – Heat in a skillet over low heat for about 2-3 minutes, flipping once until warm.
    Korean

    Frequently Asked Questions

    Here are some common questions about making Korean Cream Cheese Garlic Bread.

    What is Korean Cream Cheese Garlic Bread?

    Korean Cream Cheese Garlic Bread is a deliciously fluffy bread filled with a creamy garlic and cheese mixture, offering a perfect blend of savory flavors.

    How do I make the cream cheese filling?

    To make the filling, combine 8 ounces of softened cream cheese with 4 cloves of minced garlic, and mix well until smooth.

    Can I use different types of bread?

    Yes, you can use any soft bread like brioche or Texas toast. Just ensure it’s thick enough to hold the filling.

    What toppings can I add to my Korean Cream Cheese Garlic Bread?

    Consider adding toppings like shredded mozzarella (about 1 cup) or crushed red pepper flakes (1 teaspoon) for extra flavor and texture.

    How long does it take to prepare Korean Cream Cheese Garlic Bread?

    Preparation takes about 15 minutes, plus an additional baking time of 15-20 minutes.

    Final Thoughts

    Korean Cream Cheese Garlic Bread is not only delightful but also versatile. You can customize it by adding your favorite herbs or cheeses. Give this recipe a try; it’s sure to impress at any meal!

    Print

    Korean Cream Cheese Garlic Bread

    5 Stars 4 Stars 3 Stars 2 Stars 1 Star

    No reviews

    Korean Cream Cheese Garlic Bread is a delightful fusion of sweet and savory flavors, featuring fluffy bread filled with a creamy garlic and cheese mixture. This warm, crispy treat is perfect for gatherings, movie nights, or as a comforting snack. With its irresistible combination of textures and flavors, it is sure to impress your family and friends. Easy to make with simple ingredients, this recipe invites creativity with customizable fillings and toppings for an extra touch of flavor.

    • Author: Diana
    • Prep Time: 15 minutes
    • Cook Time: 25 minutes
    • Total Time: 40 minutes
    • Yield: Approximately 8 servings 1x
    • Category: Snack/Appetizer
    • Method: Baking
    • Cuisine: Korean

    Ingredients

    Scale
    • 3 cups all-purpose flour
    • 1 tablespoon sugar
    • 1 teaspoon salt
    • 2 teaspoons instant yeast
    • 1 cup warm water (about 110°F)
    • 2 tablespoons vegetable oil
    • 200g cream cheese, softened
    • 4 tablespoons unsalted butter, softened
    • 6 garlic cloves, minced
    • 2 tablespoons fresh parsley, chopped (or 1 tablespoon dried parsley)
    • Salt to taste
    • 2 tablespoons melted unsalted butter (for topping)
    • 1 tablespoon sesame seeds (optional)

    Instructions

    1. In a mixing bowl, combine flour, sugar, and salt. In another bowl, dissolve yeast in warm water and let sit until frothy. Combine with dry ingredients and knead in the oil until smooth.
    2. Place dough in a greased bowl, cover it, and let it rise in a warm place for about 1 hour or until doubled.
    3. For the filling, mix cream cheese, softened butter, minced garlic, parsley, and salt until smooth.
    4. Preheat oven to 375°F (190°C). Punch down risen dough and divide into eight pieces. Flatten each piece into a circle and place about one tablespoon of filling in the center. Gather edges to seal.
    5. Arrange on a lined baking sheet; brush with melted butter and sprinkle sesame seeds if desired. Bake for about 20-25 minutes or until golden brown.

    Nutrition

    • Serving Size: 1 serving
    • Calories: 175
    • Sugar: 2g
    • Sodium: 260mg
    • Fat: 8g
    • Saturated Fat: 4g
    • Unsaturated Fat: 3g
    • Trans Fat: 0g
    • Carbohydrates: 21g
    • Fiber: 1g
    • Protein: 4g
    • Cholesterol: 20mg

    Did you make this recipe?

    Share a photo and tag us — we can’t wait to see what you’ve made!

  • Easy Tiger Bread Recipe (Dutch Crunch Bread)

    Easy Tiger Bread Recipe (Dutch Crunch Bread)

    The Easy Tiger Bread Recipe (Dutch Crunch Bread) is a delightful treat that’s perfect for any occasion. This bread features a unique crunchy topping that contrasts beautifully with its soft interior. It’s not just a tasty addition to meals; it can also be enjoyed as a stand-alone snack or sandwich base. With its appealing texture and flavor, this recipe is sure to impress family and friends alike.

    Why You’ll Love This Recipe

    • Quick and Simple: The Easy Tiger Bread requires minimal ingredients and straightforward steps.
    • Mouthwatering Flavor: This bread offers a blend of crispy crust and soft crumb that everyone will adore.
    • Versatile Use: Perfect for sandwiches, toast, or as a side with soups and salads.
    • Great for Any Occasion: Whether it’s a casual brunch or a festive gathering, this bread fits right in.
    • Kid-Friendly: Kids love the fun texture and can easily help in the kitchen!

    Tools and Preparation

    To make the Easy Tiger Bread Recipe, you’ll need some essential tools to ensure success in the kitchen.

    Essential Tools and Equipment

    • Large mixing bowl
    • Measuring cups
    • Measuring spoons
    • Baking sheet
    • Parchment paper

    Importance of Each Tool

    • Large mixing bowl: A spacious bowl allows for easy mixing of all ingredients without spills.
    • Baking sheet: Provides an even surface for baking your bread, ensuring consistent results.
    • Parchment paper: Helps prevent sticking, making it easier to remove the bread after baking.

    Ingredients

    For the Bread

    • 4 cups all-purpose flour
    • 1 tablespoon sugar
    • 2 teaspoons salt
    • 1 packet (7g) instant yeast
    • 1 ½ cups warm water (about 110°F)
    • 3 tablespoons olive oil

    For the Crunch Topping

    • 1 cup rice flour
    • 1 tablespoon sugar
    • 1 teaspoon salt
    • ¾ cup water
    Easy

    How to Make Easy Tiger Bread Recipe (Dutch Crunch Bread)

    Step 1: Prepare the Dough

    In a large mixing bowl, combine the following:
    1. Add 4 cups all-purpose flour, 1 tablespoon sugar, 2 teaspoons salt, and 1 packet instant yeast. Mix well.
    2. Slowly pour in 1 ½ cups warm water, followed by 3 tablespoons olive oil. Stir until combined.
    3. Knead the dough on a floured surface for about 10 minutes until smooth and elastic.

    Step 2: First Rise

    1. Place the kneaded dough into a lightly oiled bowl, cover with a damp cloth or plastic wrap.
    2. Let it rise in a warm spot for about 1 hour or until doubled in size.

    Step 3: Prepare the Crunch Topping

    While waiting for the dough to rise, prepare the crunch topping:
    1. In another bowl, mix together 1 cup rice flour, 1 tablespoon sugar, and 1 teaspoon salt.
    2. Gradually add in ¾ cup water, stirring until you get a smooth paste.

    Step 4: Shape and Second Rise

    1. Once the dough has risen, punch it down gently and divide it into equal portions (about 6).
    2. Shape each portion into balls and place them on a baking sheet lined with parchment paper.
    3. Brush each ball with water before spreading about one tablespoon of crunch topping on each.

    Step 5: Final Bake

    Preheat your oven to 425°F (220°C). Allow the shaped dough to rest for an additional 30 minutes before placing them in the oven:
    1. Bake for about 20–25 minutes or until golden brown on top.
    2. Remove from oven and let cool on wire racks before serving.

    Enjoy your freshly baked Easy Tiger Bread!

    How to Serve Easy Tiger Bread Recipe (Dutch Crunch Bread)

    Easy Tiger Bread is not only visually appealing but also incredibly versatile. It can be served in many delightful ways, making it a perfect addition to your meals or snacks.

    Toasted with Toppings

    • Avocado Toast: Spread ripe avocado on warm slices of tiger bread for a creamy and nutritious treat.
    • Butter and Jam: A classic combination; add a pat of butter and your favorite jam for a sweet breakfast option.
    • Cream Cheese and Smoked Salmon: Top with cream cheese and thinly sliced smoked salmon for an elegant brunch dish.

    Sandwiches

    • Turkey and Swiss: Layer turkey, Swiss cheese, lettuce, and tomato between two slices for a satisfying sandwich.
    • Vegetarian Delight: Fill with hummus, cucumber slices, roasted red peppers, and spinach for a fresh veggie sandwich.
    • Egg Salad: Use this bread to hold creamy egg salad mixed with mayonnaise, mustard, and herbs.

    Dipping

    • Soup Companion: Serve warm slices alongside tomato soup or chicken broth for a comforting meal.
    • Olive Oil Dip: Drizzle with high-quality olive oil and balsamic vinegar for a simple yet flavorful appetizer.

    How to Perfect Easy Tiger Bread Recipe (Dutch Crunch Bread)

    Perfecting your Easy Tiger Bread can elevate its taste and texture. Here are some tips to ensure success every time you bake.

    • Use Fresh Yeast: Always check the expiration date on your yeast. Fresh yeast ensures the bread rises properly.
    • Knead Thoroughly: Knead the dough for at least 10 minutes. This builds gluten structure, giving your bread the right texture.
    • Allow Proper Rising Time: Let the dough rise in a warm place until doubled in size, usually about 1 hour. This step is crucial for fluffy bread.
    • Create a Crunchy Topping: Mix 100g of rice flour with 125ml of water and 1 tbsp of sugar for the topping. Spread it evenly before baking.
    • Bake with Steam: Place a shallow pan filled with hot water in the oven while baking to create steam. This enhances the crust’s crunchiness.
    • Cool Completely Before Slicing: Allow the bread to cool on a wire rack for at least 30 minutes before slicing. This prevents gummy interiors.
    Easy

    Best Side Dishes for Easy Tiger Bread Recipe (Dutch Crunch Bread)

    Pairing Easy Tiger Bread with the right side dishes can enhance your dining experience. Here are some great options to consider.

    1. Mixed Green Salad: A light salad with arugula, cherry tomatoes, and balsamic dressing complements the richness of the bread.
    2. Roasted Vegetables: Serve roasted carrots, bell peppers, and zucchini tossed in olive oil as a colorful side.
    3. French Onion Soup: The savory flavors of this classic soup pair beautifully with tiger bread’s crunchy crust.
    4. Bruschetta Topping: Top toasted slices of bread with diced tomatoes, basil, garlic, and olive oil for an Italian flair.
    5. Cheese Platter: Include assorted cheeses like Brie, cheddar, and Gouda alongside fruits and nuts for an elegant touch.
    6. Pasta Salad: A cold pasta salad made with olives, feta cheese, and cherry tomatoes makes a refreshing pairing.

    Common Mistakes to Avoid

    When making the Easy Tiger Bread Recipe, certain common mistakes can affect the outcome. Here are key errors to watch for:

    • Incorrect yeast usage – Using expired yeast can lead to flat bread. Always check the expiration date and use fresh yeast for best results.
    • Too much water – Adding more than 1 cup of water can make the dough too sticky. Measure accurately to maintain the right consistency.
    • Neglecting kneading time – Not kneading for at least 10 minutes can result in dense bread. Ensure you develop the gluten properly for a lighter texture.
    • Overproofing dough – Allowing the dough to rise for too long can cause it to collapse. Keep an eye on it and aim for about 1 hour of rising time.
    • Insufficient scoring – Failing to score the crust before baking may prevent proper expansion. Make shallow cuts with a sharp knife for a beautiful finish.

    Refrigerator Storage

    • Store in an airtight container or wrap tightly in plastic wrap.
    • Keep in the refrigerator for up to 3 days.

    Freezing Easy Tiger Bread Recipe (Dutch Crunch Bread)

    • Wrap each loaf tightly in aluminum foil or freezer-safe plastic bags.
    • Freeze for up to 3 months for optimal freshness.

    Reheating Easy Tiger Bread Recipe (Dutch Crunch Bread)

    • Oven – Preheat to 350°F (175°C), then bake for about 10-15 minutes until warmed through.
    • Microwave – Heat on medium power for 20-30 seconds. Check frequently to avoid sogginess.
    • Stovetop – Place on a skillet over low heat, cover with a lid, and warm for about 5 minutes.
    Easy

    Frequently Asked Questions

    What is Easy Tiger Bread?

    Easy Tiger Bread, also known as Dutch Crunch Bread, features a unique crispy crust and soft interior. It’s perfect for sandwiches or as a side dish.

    How do I make the crust crunchy?

    To achieve that iconic crunch, use rice flour in your topping mixture and apply it just before baking.

    Can I customize my Easy Tiger Bread Recipe (Dutch Crunch Bread)?

    Yes! Consider adding herbs like rosemary or spices such as garlic powder into the dough for added flavor.

    What should I serve with Easy Tiger Bread?

    This bread pairs well with soups, salads, or as a base for hearty sandwiches. Its versatility makes it a great addition to any meal.

    Can I use whole wheat flour instead?

    You can substitute up to half of the all-purpose flour with whole wheat flour, but keep the ratio balanced to maintain texture.

    Final Thoughts

    The Easy Tiger Bread Recipe (Dutch Crunch Bread) offers a delightful combination of textures and flavors that everyone will love. Its versatility allows you to enjoy it with various toppings or fillings, making it an excellent choice for any meal. Don’t hesitate to experiment with different ingredients and find your perfect version!

    Print

    Easy Tiger Bread Recipe (Dutch Crunch Bread)

    5 Stars 4 Stars 3 Stars 2 Stars 1 Star

    No reviews

    Easy Tiger Bread, also known as Dutch Crunch Bread, is a delightful treat that combines a unique crispy topping with a soft, airy interior. Perfect for any occasion, this bread is versatile enough to be enjoyed on its own or as a base for sandwiches and toast. Whether you’re hosting a brunch or simply looking for a delicious snack, this recipe will impress your family and friends with its appealing texture and mouthwatering flavor.

    • Author: Diana
    • Prep Time: 20 minutes
    • Cook Time: 25 minutes
    • Total Time: 45 minutes
    • Yield: Approximately six servings 1x
    • Category: Bread
    • Method: Baking
    • Cuisine: Dutch

    Ingredients

    Scale
    • 4 cups all-purpose flour
    • 1 tablespoon sugar
    • 2 teaspoons salt
    • 1 packet (7g) instant yeast
    • 1 ½ cups warm water (about 110°F)
    • 3 tablespoons olive oil
    • 1 cup rice flour
    • 1 tablespoon sugar
    • 1 teaspoon salt
    • ¾ cup water

    Instructions

    1. In a large mixing bowl, combine the all-purpose flour, sugar, salt, and instant yeast. Mix well.
    2. Gradually add warm water and olive oil. Stir until combined and knead on a floured surface for about 10 minutes until smooth.
    3. Place the dough in an oiled bowl, cover, and let rise in a warm spot for about 1 hour until doubled in size.
    4. For the crunch topping, mix rice flour, sugar, and salt in another bowl. Gradually add water to form a smooth paste.
    5. After the dough has risen, punch it down and divide it into about six equal portions. Shape each into balls on a parchment-lined baking sheet.
    6. Brush each ball with water and spread about one tablespoon of crunch topping on each before letting them rest for an additional 30 minutes.
    7. Preheat the oven to 425°F (220°C). Bake for 20–25 minutes until golden brown and cool on wire racks before serving.

    Nutrition

    • Serving Size: 1 serving
    • Calories: 230
    • Sugar: 3g
    • Sodium: 450mg
    • Fat: 6g
    • Saturated Fat: 0.9g
    • Unsaturated Fat: 4g
    • Trans Fat: 0g
    • Carbohydrates: 40g
    • Fiber: 2g
    • Protein: 6g
    • Cholesterol: 0mg

    Did you make this recipe?

    Share a photo and tag us — we can’t wait to see what you’ve made!

  • Crockpot Philly Cheesesteak Pasta Casserole

    Crockpot Philly Cheesesteak Pasta Casserole

    Crockpot Philly Cheesesteak Pasta Casserole is a delicious and hearty dish perfect for family dinners or casual gatherings. This creamy casserole combines the classic flavors of a Philly cheesesteak with pasta, ensuring everyone will enjoy every bite. It’s simple to prepare in your crockpot, making it a fantastic option for busy days when you want a comforting meal without the fuss.

    Why You’ll Love This Recipe

    • Easy to Prepare: Just throw everything in the crockpot and let it do the work while you relax.
    • Rich Flavor: The combination of cream cheese, cheddar, and bell peppers creates a mouthwatering flavor profile.
    • Versatile Dish: Perfect for any occasion—whether it’s a weeknight dinner or a potluck with friends.
    • Kid-Friendly: Kids love cheesy pasta dishes, making this a great way to please picky eaters.
    • One-Pot Wonder: Minimal cleanup required since everything cooks in one pot, keeping your kitchen neat.

    Tools and Preparation

    Before we dive into the cooking process, let’s go over the essential tools you’ll need to make this Crockpot Philly Cheesesteak Pasta Casserole.

    Essential Tools and Equipment

    • Slow cooker (crockpot)
    • Cutting board
    • Sharp knife
    • Measuring cups
    • Measuring spoons

    Importance of Each Tool

    • Slow cooker: This is the heart of the recipe, allowing for tender cooking that melds flavors beautifully.
    • Sharp knife: Essential for chopping ingredients quickly and safely, ensuring uniform pieces for even cooking.

    Ingredients

    For the Casserole

    • 2 cups uncooked pasta (penne or rigatoni)
    • 500g beef strips
    • 1 cup cream cheese
    • 1 cup shredded cheddar cheese
    • 1 medium onion, sliced
    • 1 bell pepper, sliced (red or green)
    • 2 cloves garlic, minced
    • 1 teaspoon Italian seasoning
    • Salt and black pepper to taste

    For Cooking

    • 2 tablespoons olive oil
    Crockpot

    How to Make Crockpot Philly Cheesesteak Pasta Casserole

    Step 1: Prepare the Ingredients

    Begin by slicing the onion, bell pepper, and mincing the garlic. Set these aside.

    Step 2: Brown the Beef Strips

    In a skillet over medium heat, add 2 tablespoons of olive oil. Once hot, add 500g of beef strips. Cook until browned on all sides, about 5-7 minutes. Remove from heat.

    Step 3: Combine Ingredients in the Crockpot

    In your slow cooker, add:
    1. The browned beef strips
    2. Sliced onions
    3. Sliced bell peppers
    4. Minced garlic
    5. Uncooked pasta
    6. Cream cheese
    7. Shredded cheddar cheese
    8. Italian seasoning
    9. Salt and black pepper

    Mix everything gently until well combined.

    Step 4: Cook on Low

    Cover your crockpot and set it to cook on low for 4-6 hours or high for 2-3 hours. Stir halfway through if possible to ensure even cooking.

    Step 5: Serve and Enjoy!

    Once cooked, stir again before serving to combine all ingredients thoroughly. Serve hot and enjoy your delicious Crockpot Philly Cheesesteak Pasta Casserole!

    How to Serve Crockpot Philly Cheesesteak Pasta Casserole

    Crockpot Philly Cheesesteak Pasta Casserole is a hearty dish that pairs well with various sides. Serving it the right way can enhance the meal experience and bring out its flavors.

    Pair with Garlic Bread

    • Garlic Bread: Toast slices of baguette or Italian bread with butter and minced garlic for a crispy side that complements the casserole beautifully.

    Add a Fresh Salad

    • Caesar Salad: Toss romaine lettuce with Caesar dressing, croutons, and grated Parmesan cheese to add a refreshing crunch.
    • Greek Salad: Combine diced cucumber, tomatoes, red onion, Kalamata olives, and feta cheese for a tangy contrast.

    Serve with Pickles

    • Dill Pickles: Offer crispy dill pickles on the side for a zesty bite that balances the richness of the casserole.

    Include Coleslaw

    • Creamy Coleslaw: A bowl of creamy coleslaw adds texture and freshness, making it an excellent pairing.

    How to Perfect Crockpot Philly Cheesesteak Pasta Casserole

    To achieve the best flavor and texture in your Crockpot Philly Cheesesteak Pasta Casserole, follow these useful tips.

    • Use Quality Meat: Opt for 1 pound of thinly sliced sirloin or ribeye steak for tender bites in your casserole.
    • Add Extra Veggies: Include 1 cup of sliced bell peppers or mushrooms to enhance flavor and nutrition.
    • Select the Right Pasta: Choose 8 ounces of penne or rigatoni pasta as they hold sauce well and provide a satisfying bite.
    • Incorporate Cheese Wisely: Use 2 cups of shredded provolone cheese mixed throughout and on top for a gooey finish.
    • Adjust Seasoning: Taste before serving; add salt and pepper as needed, but start with 1 teaspoon each to avoid over-seasoning.
    Crockpot

    Best Side Dishes for Crockpot Philly Cheesesteak Pasta Casserole

    Choosing the right side dishes can elevate your meal. Here are some great options that complement your Crockpot Philly Cheesesteak Pasta Casserole perfectly.

    1. Steamed Broccoli: Lightly steamed broccoli adds color and nutrients to your plate. Drizzle with olive oil for extra flavor.
    2. Roasted Potatoes: Crispy roasted potatoes seasoned with rosemary make for a comforting side. Coat 1 pound of potatoes in olive oil and herbs before roasting.
    3. Corn on the Cob: Grilled or boiled corn on the cob offers sweetness that contrasts nicely with savory casserole flavors.
    4. Baked Beans: Sweet baked beans can provide a hearty balance; consider serving them in small bowls alongside the casserole.
    5. Sweet Potato Fries: Homemade sweet potato fries seasoned with salt and paprika add crunch and sweetness to your meal.
    6. Fruit Salad: A light fruit salad featuring strawberries, blueberries, and melon can refresh your palate after rich bites of casserole.

    Common Mistakes to Avoid

    When preparing your Crockpot Philly Cheesesteak Pasta Casserole, there are a few common mistakes you should steer clear of to ensure a delicious dish.

    • Overcooking the pasta – If you let the pasta cook for too long in the crockpot, it can become mushy. Aim to add it during the last 30 minutes of cooking.
    • Too much salt – Adding too much salt can overpower the flavors. Limit your salt to 1/2 teaspoon when seasoning.
    • Ignoring ingredient sizes – Using different quantities than specified can affect the texture and taste. Stick to 1 pound of beef and 8 ounces of pasta for best results.
    • Not browning the meat – Skipping this step may lead to a less flavorful casserole. Always brown your 1 pound of beef before adding it to the crockpot.
    • Skipping cheese – Cheese adds creaminess and flavor. Don’t omit it; use at least 2 cups of shredded provolone or mozzarella cheese.

    Storage & Reheating Instructions

    Refrigerator Storage

    • Duration – Store in an airtight container for up to 3 days.
    • Temperature – Ensure your refrigerator is set below 40°F (4°C).
    • Cooling – Allow the casserole to cool completely before refrigerating.

    Freezing Crockpot Philly Cheesesteak Pasta Casserole

    • Containers – Use freezer-safe containers or heavy-duty freezer bags.
    • Duration – Freeze for up to 3 months for best quality.
    • Thawing – Thaw overnight in the refrigerator before reheating.

    Reheating Crockpot Philly Cheesesteak Pasta Casserole

    • Oven – Preheat to 350°F (175°C). Cover with foil and bake for about 20-25 minutes until heated through.
    • Microwave – Heat in microwave-safe containers in 1-minute intervals, stirring between each interval until warm.
    • Stovetop – Place in a pot over medium heat, adding a splash of water if necessary, and stir occasionally until hot.
    Crockpot

    Frequently Asked Questions

    This section addresses common queries regarding the Crockpot Philly Cheesesteak Pasta Casserole.

    Can I use other meats instead of beef?

    Yes! You can substitute with chicken or turkey. Use about 1 pound and adjust cooking time as needed.

    How do I make this recipe vegetarian?

    To make a vegetarian version, replace beef with sautéed mushrooms and add bell peppers. Use vegetable broth instead of beef broth.

    What type of cheese works best?

    Provolone and mozzarella are excellent choices. Aim for at least 2 cups total for optimal creaminess.

    Can I add vegetables?

    Absolutely! Consider adding diced bell peppers or onions. About 1 cup each will add flavor and texture.

    How long does it take to cook in the crockpot?

    Cooking time is typically around 6 hours on low or 4 hours on high, depending on your crockpot model.

    Final Thoughts

    Crockpot Philly Cheesesteak Pasta Casserole is not only easy to prepare but also incredibly versatile. Feel free to customize it by adding your favorite vegetables or adjusting the seasonings. This dish is perfect for busy weeknights or gatherings—give it a try!

    Print

    Crockpot Philly Cheesesteak Pasta Casserole

    5 Stars 4 Stars 3 Stars 2 Stars 1 Star

    No reviews

    Crockpot Philly Cheesesteak Pasta Casserole is the ultimate comfort food that marries the beloved flavors of a classic Philly cheesesteak with hearty pasta. This creamy, cheesy dish is perfect for busy weeknights or casual gatherings, offering a satisfying meal that pleases both kids and adults alike. With minimal prep time and a slow cooker doing all the heavy lifting, you can enjoy rich flavors without spending hours in the kitchen. Just gather your ingredients, set your crockpot, and relax while this savory casserole cooks to perfection!

    • Author: Diana
    • Prep Time: 15 minutes
    • Cook Time: 4-6 hours
    • Total Time: 0 hours
    • Yield: Serves 6
    • Category: Dinner
    • Method: Slow Cooker
    • Cuisine: American

    Ingredients

    Scale
    • 2 cups uncooked penne or rigatoni pasta
    • 500g beef strips (thinly sliced)
    • 1 cup cream cheese
    • 1 cup shredded cheddar cheese
    • 1 medium onion (sliced)
    • 1 bell pepper (sliced, red or green)
    • 2 cloves garlic (minced)
    • 1 teaspoon Italian seasoning
    • Salt and black pepper to taste
    • 2 tablespoons olive oil

    Instructions

    1. Slice the onion and bell pepper, then mince the garlic.
    2. In a skillet, heat olive oil over medium heat. Add beef strips and cook until browned, about 5-7 minutes. Remove from heat.
    3. In your crockpot, combine the browned beef, sliced onions, bell peppers, minced garlic, uncooked pasta, cream cheese, cheddar cheese, Italian seasoning, salt, and black pepper. Mix gently until well combined.
    4. Cover the crockpot and cook on low for 4-6 hours or high for 2-3 hours. Stir occasionally if possible.
    5. Once cooked, stir before serving and enjoy hot.

    Nutrition

    • Serving Size: 1 cup (240g)
    • Calories: 460
    • Sugar: 3g
    • Sodium: 810mg
    • Fat: 24g
    • Saturated Fat: 10g
    • Unsaturated Fat: 12g
    • Trans Fat: 0g
    • Carbohydrates: 38g
    • Fiber: 2g
    • Protein: 26g
    • Cholesterol: 75mg

    Did you make this recipe?

    Share a photo and tag us — we can’t wait to see what you’ve made!

  • Lobster and Shrimp Corn Chowder

    Lobster and Shrimp Corn Chowder

    Lobster and Shrimp Corn Chowder is a delightful dish that perfectly combines the richness of seafood with the sweetness of corn. This chowder is ideal for cozy family dinners or elegant gatherings, offering a creamy texture and vibrant flavors that will impress your guests. The addition of succulent lobster and shrimp elevates this chowder to a luxurious level, making it a standout choice for any occasion.

    Why You’ll Love This Recipe

    • Rich and Creamy: The combination of cream and seafood creates a luscious texture that’s hard to resist.
    • Quick to Prepare: With simple steps, you can whip up this chowder in under an hour.
    • Perfect for Any Occasion: Whether it’s a casual weeknight dinner or a fancy gathering, this dish fits right in.
    • Packed with Flavor: A blend of herbs and spices enhances the natural flavors of the lobster and shrimp.
    • Customizable: Feel free to add your favorite vegetables or adjust seasonings to suit your taste.

    Tools and Preparation

    To make Lobster and Shrimp Corn Chowder, you’ll need some essential tools to ensure everything comes together smoothly.

    Essential Tools and Equipment

    • Soup pot
    • Ladle
    • Cutting board
    • Chef’s knife
    • Measuring cups and spoons

    Importance of Each Tool

    • Soup pot: A large pot is crucial for cooking the chowder evenly without overcrowding ingredients.
    • Ladle: This tool helps serve the chowder without making a mess, ensuring everyone gets a generous portion.

    Ingredients

    For the Chowder Base

    • 2 tablespoons olive oil
    • 1 medium onion, chopped (about 150g)
    • 2 cloves garlic, minced
    • 3 cups corn kernels (fresh or frozen)
    • 4 cups vegetable broth
    • 1 cup heavy cream

    For the Seafood

    • 200g cooked lobster meat, chopped
    • 200g shrimp, peeled and deveined

    For Seasoning

    • 1 teaspoon dried thyme
    • 1 teaspoon paprika
    • Salt and black pepper to taste

    For Garnish

    • 2 tablespoons fresh parsley, chopped
    Lobster

    How to Make Lobster and Shrimp Corn Chowder

    Step 1: Sauté Vegetables

    In a large soup pot, heat 2 tablespoons of olive oil. Add the chopped onion, cooking until translucent (about 5 minutes). Stir in the minced garlic, sautéing for an additional minute until fragrant.

    Step 2: Add Corn and Broth

    Add in 3 cups of corn kernels, followed by 4 cups of vegetable broth. Bring this mixture to a gentle boil. Reduce heat and let simmer for about 10 minutes.

    Step 3: Incorporate Cream

    Once simmered, stir in 1 cup of heavy cream. Allow it to heat through on low for about 5 minutes. This will give your chowder that rich consistency.

    Step 4: Add Seafood

    Gently fold in the chopped 200g cooked lobster meat and peeled 200g shrimp. Cook until the shrimp are pink and opaque (approximately 5-7 minutes).

    Step 5: Season

    Add in 1 teaspoon dried thyme, 1 teaspoon paprika, along with salt and black pepper to taste. Stir well to combine all flavors.

    Step 6: Serve

    Ladle the chowder into bowls. Garnish with fresh chopped parsley before serving hot. Enjoy your delicious Lobster and Shrimp Corn Chowder!

    How to Serve Lobster and Shrimp Corn Chowder

    Lobster and Shrimp Corn Chowder is a delightful dish that is perfect for any occasion. Serving it correctly can enhance its flavor and presentation.

    Pairing with Crusty Bread

    • Sourdough Bread: A warm slice of sourdough adds a tangy contrast to the chowder.
    • Garlic Bread: Toasted garlic bread pairs beautifully, adding a rich flavor to each spoonful.

    Adding Fresh Herbs

    • Chopped Parsley: Sprinkle a tablespoon of chopped parsley on top for a fresh touch.
    • Thyme Leaves: A few sprigs of thyme can elevate the aroma and taste.

    Topping Options

    • Crumbled Bacon: A sprinkle of crispy bacon bits adds a savory crunch.
    • Chili Flakes: For those who enjoy heat, add a pinch of chili flakes to spice things up.

    How to Perfect Lobster and Shrimp Corn Chowder

    Perfecting your Lobster and Shrimp Corn Chowder takes attention to detail, but it’s worth every effort for an incredible meal.

    • Use Fresh Seafood: Always use 8 ounces of fresh lobster meat and 8 ounces of shrimp for the best flavor.
    • Adjust Consistency: If the chowder is too thick, add an extra cup of seafood stock to thin it out.
    • Enhance Flavor: Sauté 1 medium onion and 2 cloves of garlic before adding them to deepen the flavors.
    • Season Generously: Don’t forget to season with salt and pepper—start with 1 teaspoon each, adjusting to taste.
    • Simmer Slowly: Allow the chowder to simmer for at least 30 minutes; this helps meld all the flavors together.
    Lobster

    Best Side Dishes for Lobster and Shrimp Corn Chowder

    Serving side dishes alongside your Lobster and Shrimp Corn Chowder can create a well-rounded meal experience. Here are some great options:

    1. Mixed Green Salad: A light salad with vinaigrette complements the richness of the chowder.
    2. Cornbread: Sweet cornbread pairs perfectly, balancing the savory elements in your chowder.
    3. Steamed Asparagus: Bright green asparagus drizzled with lemon enhances both color and flavor.
    4. Baked Potatoes: Simple baked potatoes offer a hearty addition, allowing guests to scoop up chowder as they please.
    5. Grilled Vegetables: Seasonal grilled veggies bring freshness and texture that contrast nicely with the soup.
    6. Cheesy Garlic Biscuits: Soft biscuits loaded with cheese make for a comforting side that everyone will love.

    Common Mistakes to Avoid

    Avoiding common mistakes can elevate your Lobster and Shrimp Corn Chowder to the next level. Here are some pitfalls to be aware of:

    • Using stale ingredients – Always check that your seafood is fresh. Use 1 pound of fresh lobster and 1 pound of shrimp for optimal flavor.
    • Overcooking seafood – Cook lobster and shrimp just until they are opaque, which usually takes 3-5 minutes.
    • Ignoring seasoning – Use salt wisely; limit it to 1 teaspoon for the entire chowder to prevent overpowering the dish.
    • Skipping the roux – A proper roux is essential for a creamy texture; use 1/4 cup of flour with your butter.
    • Not blending flavors – Allow the chowder to simmer for at least 20 minutes after adding all ingredients, letting flavors meld beautifully.

    Storage & Reheating Instructions

    Refrigerator Storage

    • Store in an airtight container.
    • The chowder lasts for up to 3 days in the refrigerator.
    • Cool completely before refrigerating to maintain quality.

    Freezing Lobster and Shrimp Corn Chowder

    • Freeze in a freezer-safe container or heavy-duty zip-top bag.
    • It can be frozen for up to 3 months.
    • Leave some space at the top of the container as it may expand when frozen.

    Reheating Lobster and Shrimp Corn Chowder

    • Oven – Preheat to 350°F (175°C). Place in an oven-safe dish and cover with foil. Heat for about 25-30 minutes.
    • Microwave – Transfer to a microwave-safe bowl. Heat in 1-minute intervals, stirring between, until hot.
    • Stovetop – Pour into a pot over medium heat, stir occasionally until heated through, about 10-15 minutes.
    Lobster

    Frequently Asked Questions

    What is Lobster and Shrimp Corn Chowder?

    Lobster and Shrimp Corn Chowder is a creamy soup made with fresh seafood, corn, potatoes, and seasonings. It’s hearty and perfect for any occasion.

    Can I use frozen seafood for Lobster and Shrimp Corn Chowder?

    Yes! If using frozen seafood, ensure it’s fully thawed before cooking. Use about 1 pound each of thawed lobster and shrimp.

    How can I make my chowder thicker?

    To thicken your Lobster and Shrimp Corn Chowder, mix together equal parts cornstarch and water (about 2 tablespoons each), then stir it into the simmering chowder.

    Is there a way to make this chowder dairy-free?

    Absolutely! Substitute heavy cream with coconut milk or almond milk in equal amounts for a dairy-free option while maintaining creaminess.

    How do I customize my Lobster and Shrimp Corn Chowder?

    You can add vegetables like bell peppers or carrots (about 1 cup) for added nutrition, or spice it up with cayenne pepper (up to 1/4 teaspoon) for heat.

    Final Thoughts

    Lobster and Shrimp Corn Chowder is not only delicious but also versatile. You can customize it with various vegetables or spices based on your preferences. Give this recipe a try, and enhance your dining experience with its rich flavors!

    Print

    Lobster and Shrimp Corn Chowder

    5 Stars 4 Stars 3 Stars 2 Stars 1 Star

    No reviews

    Lobster and Shrimp Corn Chowder is a luxurious, creamy soup that brings the ocean’s bounty right to your table. This dish combines the sweet flavors of fresh corn with tender lobster and succulent shrimp, creating a delightful blend of textures and tastes. Perfect for cozy family dinners or elegant gatherings, this chowder will impress your guests and leave them asking for seconds. With its rich consistency and vibrant flavors, it’s a comfort food classic that’s surprisingly easy to prepare.

    • Author: Diana
    • Prep Time: 15 minutes
    • Cook Time: 30 minutes
    • Total Time: 45 minutes
    • Yield: Approximately 6 servings 1x
    • Category: Lunch & Dinner
    • Method: Cooking
    • Cuisine: Seafood

    Ingredients

    Scale
    • 2 tablespoons olive oil
    • 1 medium onion, chopped (about 150g)
    • 2 cloves garlic, minced
    • 3 cups corn kernels (fresh or frozen)
    • 4 cups vegetable broth
    • 1 cup heavy cream
    • 200g cooked lobster meat, chopped
    • 200g shrimp, peeled and deveined
    • 1 teaspoon dried thyme
    • 1 teaspoon paprika
    • Salt and black pepper to taste
    • 2 tablespoons fresh parsley, chopped (for garnish)

    Instructions

    1. In a large soup pot, heat olive oil over medium heat. Add chopped onion and cook until translucent (about 5 minutes). Stir in minced garlic and sauté for an additional minute.
    2. Add corn kernels and vegetable broth to the pot. Bring to a gentle boil, then reduce heat and let simmer for about 10 minutes.
    3. Stir in heavy cream and heat through on low for about 5 minutes.
    4. Gently fold in the chopped lobster meat and shrimp. Cook until shrimp are pink and opaque (approximately 5-7 minutes).
    5. Season with dried thyme, paprika, salt, and black pepper. Stir well to combine.
    6. Ladle chowder into bowls and garnish with fresh parsley before serving hot.

    Nutrition

    • Serving Size: 1 serving
    • Calories: 350
    • Sugar: 3g
    • Sodium: 800mg
    • Fat: 22g
    • Saturated Fat: 10g
    • Unsaturated Fat: 11g
    • Trans Fat: 0g
    • Carbohydrates: 30g
    • Fiber: 3g
    • Protein: 15g
    • Cholesterol: 80mg

    Did you make this recipe?

    Share a photo and tag us — we can’t wait to see what you’ve made!

  • Million Dollar Baked Ziti

    Million Dollar Baked Ziti

    Million Dollar Baked Ziti is a delightful dish that combines layers of rich flavors and creamy textures, making it perfect for family dinners or gatherings. This comforting meal is sure to impress your guests with its cheesy goodness and hearty pasta. With its easy preparation and satisfying taste, Million Dollar Baked Ziti is a standout recipe for any occasion.

    Why You’ll Love This Recipe

    • Easy to Prepare: This baked ziti comes together quickly, making it ideal for busy weeknights or last-minute gatherings.
    • Rich Flavor: The combination of cheeses, marinara, and herbs creates a deliciously savory experience in every bite.
    • Crowd-Pleaser: With its cheesy layers and hearty pasta, this dish appeals to both kids and adults alike.
    • Versatile Ingredients: You can easily swap out ingredients based on what you have on hand or personal preferences.
    • Make-Ahead Option: Prepare this dish in advance and simply bake it before serving for effortless entertaining.

    Tools and Preparation

    To make Million Dollar Baked Ziti effortlessly, gather the essential tools you’ll need before you start cooking.

    Essential Tools and Equipment

    • Large pot
    • 9×13-inch baking dish
    • Mixing bowl
    • Cooking spoon
    • Aluminum foil

    Importance of Each Tool

    • Large pot: Boils water quickly for cooking the pasta.
    • 9×13-inch baking dish: Perfect size for layering your baked ziti, ensuring even cooking.
    • Mixing bowl: Ideal for combining all the cheesy goodness before baking.

    Ingredients

    For the Pasta

    • 12 ounces ziti pasta

    For the Cheese Mixture

    • 2 cups ricotta cheese
    • 1 cup grated Parmesan cheese
    • 2 cups shredded mozzarella cheese
    • 1 large egg

    For the Marinara Sauce

    • 4 cups marinara sauce

    For Seasoning

    • 1 teaspoon garlic powder
    • 1 teaspoon onion powder
    • Salt and black pepper to taste
    Million

    How to Make Million Dollar Baked Ziti

    Step 1: Cook the Pasta

    1. In a large pot, bring salted water to a boil.
    2. Add 12 ounces ziti pasta, cooking until al dente according to package instructions. Drain and set aside.

    Step 2: Prepare the Cheese Mixture

    1. In a mixing bowl, combine 2 cups ricotta cheese, 1 cup grated Parmesan cheese, 2 cups shredded mozzarella cheese, and 1 large egg.
    2. Add 1 teaspoon garlic powder, 1 teaspoon onion powder, and season with salt and black pepper to taste. Mix well until fully combined.

    Step 3: Layer the Ingredients

    1. Preheat your oven to 375°F (190°C).
    2. In the bottom of a 9×13-inch baking dish, spread half of the 4 cups marinara sauce.
    3. Layer half of the cooked ziti on top of the sauce.
    4. Spread half of the cheese mixture over the ziti.
    5. Repeat layers with remaining marinara sauce, ziti, and cheese mixture.

    Step 4: Bake

    1. Cover the baking dish with aluminum foil.
    2. Bake in preheated oven for 25 minutes.
    3. Remove foil and bake an additional 15 minutes or until bubbly and golden brown on top.

    Enjoy your delicious Million Dollar Baked Ziti!

    How to Serve Million Dollar Baked Ziti

    Serving Million Dollar Baked Ziti is a delightful experience, as this dish is hearty and flavorful. It makes a fantastic centerpiece for any meal, whether it’s a family dinner or a special occasion. Here are some creative serving suggestions to enhance your dining experience.

    Classic Presentation

    • Serve the baked ziti directly from the baking dish for a rustic look.
    • Garnish with freshly chopped parsley for a pop of color.

    Accompanying Salad

    • Pair with a simple green salad made with 4 cups of mixed greens, cherry tomatoes, and a light vinaigrette dressing.
    • Add sliced cucumbers and red onions for extra crunch.

    Bread Pairing

    • Complement your baked ziti with garlic bread made from 1 loaf of Italian bread, buttered and sprinkled with garlic powder.
    • Offer crusty French bread to soak up the delicious sauce.

    Wine Selection

    • Serve with a glass of red wine, such as Chianti or Merlot, to enhance the flavors of the dish.
    • For a non-alcoholic option, try sparkling grape juice for a festive touch.

    Leftover Ideas

    • Reheat leftovers in individual portions for easy lunches throughout the week.
    • Transform leftover ziti into stuffed peppers by mixing with diced bell peppers and baking until heated through.

    How to Perfect Million Dollar Baked Ziti

    To achieve the best results with Million Dollar Baked Ziti, consider these helpful tips that will elevate your dish.

    • Use quality ingredients: Opt for high-quality marinara sauce (about 4 cups) and shredded mozzarella cheese (2 cups) for richer flavors.
    • Layer wisely: Alternate layers of pasta, sauce, and cheese to ensure even distribution and maximum flavor throughout the dish.
    • Add extra seasoning: Incorporate 1 teaspoon of Italian seasoning or fresh basil to enhance the aroma and taste.
    • Cook pasta al dente: Boil 16 ounces of ziti until just firm; this prevents mushiness when baking.
    • Let it rest: Allow your baked ziti to sit for 10-15 minutes after baking for easier slicing and serving.
    • Experiment with cheeses: Mix in 1 cup of ricotta cheese for creaminess or use provolone cheese for added depth.
    Million

    Best Side Dishes for Million Dollar Baked Ziti

    Pairing side dishes with Million Dollar Baked Ziti can elevate your meal further. Here are some excellent choices that complement its rich flavors perfectly.

    1. Caesar Salad: A classic Caesar salad consists of romaine lettuce, croutons, parmesan cheese, and Caesar dressing for tangy goodness.
    2. Steamed Broccoli: Simple steamed broccoli adds color and nutrients; season it lightly with salt and pepper.
    3. Garlic Knots: Prepare garlic knots using pizza dough brushed with garlic butter; they’re perfect for dipping!
    4. Roasted Vegetables: Roast seasonal vegetables like zucchini and bell peppers drizzled with olive oil (about 2 tablespoons) at 400°F (200°C).
    5. Caprese Salad: This fresh salad includes sliced tomatoes, mozzarella cheese, basil leaves, drizzled with balsamic reduction.
    6. Antipasto Platter: Assemble an antipasto platter featuring olives, cured meats, cheeses, and marinated artichokes for variety.

    Common Mistakes to Avoid

    When making Million Dollar Baked Ziti, avoiding common mistakes can elevate your dish from good to great. Here are some pitfalls to watch out for:

    • Skipping the cheese layer – This dish is known for its cheesy goodness. Ensure you layer at least 2 cups of mozzarella cheese for that creamy texture.
    • Overcooking the pasta – Cook ziti until it’s al dente, about 8-10 minutes. Overcooked pasta can become mushy in the oven.
    • Using too much salt – Limit salt to 1/2 teaspoon when seasoning your sauce to keep the flavors balanced without overwhelming the dish.
    • Not allowing it to rest – Letting the baked ziti sit for 10-15 minutes after baking helps it set and makes serving easier.
    • Forgetting fresh herbs – Fresh basil or parsley adds a burst of flavor. Add at least 1 tablespoon of chopped fresh herbs before serving for added freshness.

    Refrigerator Storage

    • Store in an airtight container for up to 4 days.
    • Allow the ziti to cool completely before storing to prevent condensation.

    Freezing Million Dollar Baked Ziti

    • Wrap tightly in plastic wrap and then aluminum foil for up to 3 months.
    • Label with the date and contents to keep track of what you have stored.

    Reheating Million Dollar Baked Ziti

    • Oven – Preheat to 350°F (175°C), cover with foil, and heat for about 20-25 minutes.
    • Microwave – Place in a microwave-safe dish, cover, and heat on medium power for about 5-7 minutes, stirring halfway through.
    • Stovetop – Heat in a skillet over medium-low heat with a splash of water or sauce, stirring until warmed through.
    Million

    Frequently Asked Questions

    What is Million Dollar Baked Ziti?

    Million Dollar Baked Ziti is a creamy, cheesy pasta bake made with ziti noodles, marinara sauce, ricotta cheese, and mozzarella. It’s a comforting dish loved by many.

    Can I substitute ingredients in Million Dollar Baked Ziti?

    Yes! You can substitute ricotta cheese with cottage cheese (use about 2 cups) or use gluten-free ziti if needed.

    How do I make Million Dollar Baked Ziti vegetarian-friendly?

    To make it vegetarian, simply omit any meat. You can add vegetables like spinach or mushrooms instead for extra flavor and nutrition.

    How long does it take to prepare Million Dollar Baked Ziti?

    Preparation takes about 20 minutes, while baking requires around 30 minutes. Overall, expect a total time of about 50 minutes.

    Can I make Million Dollar Baked Ziti ahead of time?

    Absolutely! You can prepare it a day in advance and store it in the refrigerator. Just remember to bake it just before serving.

    Final Thoughts

    Million Dollar Baked Ziti is not only delicious but also versatile. You can customize it by adding vegetables or protein according to your preference. It’s perfect for feeding a crowd or meal prepping for the week ahead. Give this recipe a try; you won’t be disappointed!

    Print

    Million Dollar Baked Ziti

    5 Stars 4 Stars 3 Stars 2 Stars 1 Star

    No reviews

    Million Dollar Baked Ziti is a comforting, cheesy pasta bake that brings together layers of rich flavors and creamy textures. Perfect for family dinners or gatherings, this dish features ziti pasta enveloped in a savory marinara sauce and a delightful blend of ricotta, mozzarella, and Parmesan cheeses. With its easy preparation and satisfying taste, it’s sure to impress your guests and become a favorite in your household. Whether you’re looking for a hearty meal on a busy weeknight or planning an effortless gathering with friends, this baked ziti recipe is the ultimate comfort food.

    • Author: Diana
    • Prep Time: 20 minutes
    • Cook Time: 40 minutes
    • Total Time: 1 hour
    • Yield: Serves approximately 8 people 1x
    • Category: Main
    • Method: Baking
    • Cuisine: Italian

    Ingredients

    Scale
    • 12 ounces ziti pasta
    • 2 cups ricotta cheese
    • 1 cup grated Parmesan cheese
    • 2 cups shredded mozzarella cheese
    • 1 large egg
    • 4 cups marinara sauce
    • 1 teaspoon garlic powder
    • 1 teaspoon onion powder
    • Salt and black pepper to taste

    Instructions

    1. Preheat the oven to 375°F (190°C).
    2. In a large pot, boil salted water and cook the ziti pasta until al dente (about 8-10 minutes). Drain and set aside.
    3. In a mixing bowl, combine ricotta cheese, grated Parmesan cheese, shredded mozzarella cheese, egg, garlic powder, onion powder, salt, and black pepper. Mix until well combined.
    4. In a greased 9×13-inch baking dish, spread half of the marinara sauce on the bottom.
    5. Layer half of the cooked ziti over the sauce followed by half of the cheese mixture. Repeat with remaining sauce, ziti, and cheese mixture.
    6. Cover with aluminum foil and bake for 25 minutes. Remove foil and bake for an additional 15 minutes or until bubbly and golden brown.

    Nutrition

    • Serving Size: 1/8 of recipe (approx. 200g)
    • Calories: 450
    • Sugar: 6g
    • Sodium: 700mg
    • Fat: 20g
    • Saturated Fat: 10g
    • Unsaturated Fat: 8g
    • Trans Fat: 0g
    • Carbohydrates: 45g
    • Fiber: 3g
    • Protein: 24g
    • Cholesterol: 95mg

    Did you make this recipe?

    Share a photo and tag us — we can’t wait to see what you’ve made!

  • Easy Spaghetti Pie

    Easy Spaghetti Pie

    Easy Spaghetti Pie brings a delightful twist to a classic favorite, making it perfect for family dinners or casual gatherings. This dish combines the comforting flavors of spaghetti with a unique pie structure that is both fun and easy to prepare. It’s an excellent choice whether you’re serving guests or enjoying a cozy night in, and its versatility allows for endless variations based on what you have at hand.

    Why You’ll Love This Recipe

    • Quick and Easy: This dish can be prepared in under an hour, making it an ideal weeknight meal.
    • Deliciously Flavorful: The blend of cheese, vegetables, and seasonings creates a rich flavor that will please all palates.
    • Customizable: You can easily swap ingredients based on your preferences or what’s in your pantry, ensuring every pie is unique.
    • Family-Friendly: Kids love the fun shape and cheesy goodness, making it a hit for all ages.
    • Leftover Friendly: This recipe stores well, allowing you to enjoy leftovers the next day.

    Tools and Preparation

    To make your Easy Spaghetti Pie, having the right tools will streamline the process. Here’s what you’ll need:

    Essential Tools and Equipment

    • Large pot
    • Colander
    • Mixing bowl
    • 9-inch pie dish
    • Spatula

    Importance of Each Tool

    • Large pot: Essential for boiling the spaghetti efficiently.
    • Colander: Helps drain excess water from the pasta after cooking.
    • Mixing bowl: Ideal for combining ingredients evenly before baking.

    Ingredients

    For the Pie Filling

    • 8 ounces spaghetti
    • 2 tablespoons olive oil
    • 1 medium onion, chopped
    • 3 garlic cloves, minced
    • 1 bell pepper, diced
    • 1 zucchini, diced
    • 1 teaspoon dried oregano
    • 1/2 teaspoon salt
    • 1/4 teaspoon black pepper
    • 1 cup marinara sauce
    • 2 cups shredded mozzarella cheese

    For Topping

    • 2 large eggs
    • 1/2 cup grated Parmesan cheese
    Easy

    How to Make Easy Spaghetti Pie

    Step 1: Cook the Spaghetti

    1. In a large pot, bring water to a boil and add 8 ounces of spaghetti. Cook according to package instructions until al dente, about 8-10 minutes.
    2. Once cooked, drain the spaghetti using a colander and set aside.

    Step 2: Sauté Vegetables

    1. In the same pot, heat 2 tablespoons of olive oil over medium heat.
    2. Add 1 medium chopped onion and sauté until translucent, about 3-4 minutes.
    3. Stir in 3 minced garlic cloves, 1 diced bell pepper, and 1 diced zucchini; cook for another 5 minutes until vegetables are tender.

    Step 3: Combine Ingredients

    1. In a mixing bowl, combine the drained spaghetti with sautéed vegetables.
    2. Add 1 teaspoon dried oregano, 1/2 teaspoon salt, 1/4 teaspoon black pepper, and 1 cup marinara sauce; mix well.
    3. Fold in 2 cups shredded mozzarella cheese until evenly distributed.

    Step 4: Prepare the Pie Dish

    1. Preheat your oven to 375°F (190°C).
    2. Grease a 9-inch pie dish lightly with cooking spray or olive oil.
    3. Pour the spaghetti mixture into the prepared dish, pressing down gently to create an even layer.

    Step 5: Add Topping

    1. In a separate bowl, whisk together 2 large eggs and stir in 1/2 cup grated Parmesan cheese.
    2. Pour this egg mixture evenly over the spaghetti pie filling.

    Step 6: Bake

    1. Place the pie dish in the preheated oven and bake for about 25-30 minutes or until golden brown on top.
    2. Remove from oven and let cool slightly before slicing.

    Enjoy your Easy Spaghetti Pie as a delightful centerpiece at your next meal!

    How to Serve Easy Spaghetti Pie

    Serving Easy Spaghetti Pie is a delightful experience that can be tailored to various occasions. Whether it’s a family dinner or a casual gathering, these serving suggestions will enhance your dish.

    Individual Servings

    • Personal Portions: Cut the pie into wedges and serve each person their own piece. This makes for easy plating and portion control.
    • Savory Slices: Pair each slice with a side salad for a balanced meal. A simple garden salad with 1 cup of mixed greens works well.

    Toppings and Garnishes

    • Fresh Basil: Sprinkle 1 tablespoon of freshly chopped basil on top for added flavor and color.
    • Parmesan Cheese: Grate 2 tablespoons of Parmesan cheese over each slice before serving to boost richness.

    Accompaniments

    • Garlic Bread: Serve with 2 slices of garlic bread on the side for an authentic Italian experience.
    • Olive Oil Drizzle: Add a light drizzle of olive oil (about 1 teaspoon) over the pie for extra moisture and taste.

    How to Perfect Easy Spaghetti Pie

    Perfecting your Easy Spaghetti Pie can elevate this dish from good to great. Here are some tips to ensure it turns out perfectly every time.

    • Use Al Dente Pasta: Cook your spaghetti until just al dente, about 8 minutes. This prevents overcooking during baking.
    • Season Your Sauce: Enhance your sauce by adding 1 teaspoon of Italian seasoning. This adds depth to the flavor profile.
    • Mix Ingredients Thoroughly: Combine all ingredients evenly in the mixing bowl to ensure each bite has a balanced taste.
    • Adjust Baking Time: Bake until golden brown, around 30-35 minutes, checking at intervals to prevent burning.
    • Let It Rest: Allow the pie to rest for 10 minutes after baking. This helps set the layers and makes slicing easier.
    Easy

    Best Side Dishes for Easy Spaghetti Pie

    Pairing side dishes with your Easy Spaghetti Pie can enhance your meal. Consider these delicious options that complement the flavors beautifully.

    1. Caesar Salad: A classic Caesar salad made with romaine lettuce, croutons, and Caesar dressing provides a crisp contrast.
    2. Steamed Broccoli: Lightly steamed broccoli (about 1 cup) adds color and nutrition without overpowering flavors.
    3. Garlic Knots: Serve warm garlic knots brushed with melted butter (about 2 tablespoons). They are perfect for dipping!
    4. Antipasto Platter: Create a platter with olives, marinated artichokes, and sliced salami for a variety of tastes.
    5. Caprese Salad: Fresh mozzarella, tomatoes, and basil drizzled with balsamic glaze make for a refreshing side.
    6. Roasted Vegetables: Season assorted vegetables like zucchini and bell peppers with olive oil (about 1 tablespoon) and roast until tender.

    These sides will bring balance and variety to your meal featuring Easy Spaghetti Pie!

    Common Mistakes to Avoid

    When making Easy Spaghetti Pie, it’s essential to avoid common pitfalls that can affect the dish’s taste and texture.

    • Using uncooked spaghetti – Make sure to cook the spaghetti for at least 8-10 minutes before mixing it with other ingredients. This ensures it’s tender and absorbs flavors well.
    • Not measuring the cheese – Using too much cheese can make the pie greasy. Limit cheese to 2 cups for a balanced flavor.
    • Ignoring seasoning – Failing to season properly can lead to blandness. Use at least 1 teaspoon of salt and 1/2 teaspoon of pepper for a great taste.
    • Overloading with vegetables – Adding too many vegetables might make the pie watery. Stick to about 1 cup of mixed veggies for the best texture.
    • Skipping the egg – The egg helps bind everything together. Ensure you add 1 large egg to hold your pie firm.

    Storage & Reheating Instructions

    Refrigerator Storage

    • Store in an airtight container.
    • Keeps well for up to 3 days in the fridge.

    Freezing Easy Spaghetti Pie

    • Wrap tightly in plastic wrap or aluminum foil.
    • Can be frozen for up to 2 months.

    Reheating Easy Spaghetti Pie

    • Oven – Preheat to 350°F (175°C). Cover with foil and heat for about 20-25 minutes until warmed through.
    • Microwave – Heat slices on medium power for about 2-3 minutes, checking every minute.
    • Stovetop – Place in a skillet over low heat, cover, and warm for about 10 minutes, stirring occasionally.
    Easy

    Frequently Asked Questions

    If you have questions about preparing your Easy Spaghetti Pie, here are some common inquiries.

    Can I customize my Easy Spaghetti Pie?

    Yes! You can add different meats like cooked ground beef (1 cup) or turkey, or swap out veggies based on your preference.

    How do I know when my Easy Spaghetti Pie is done?

    Your pie should be set in the middle and lightly browned on top. A cooking time of about 30-35 minutes at 350°F (175°C) is typical.

    What should I serve with Easy Spaghetti Pie?

    This dish pairs well with a simple side salad or garlic bread. A light dressing complements it nicely.

    Can I make Easy Spaghetti Pie ahead of time?

    Absolutely! You can prepare it a day in advance, store it in the fridge, and bake it just before serving.

    Final Thoughts

    The Easy Spaghetti Pie is not only delicious but also versatile. You can easily customize it with different ingredients based on your taste preferences. Try making this dish for an easy weeknight dinner or a potluck, and enjoy its comforting flavors!

    Print

    Easy Spaghetti Pie

    5 Stars 4 Stars 3 Stars 2 Stars 1 Star

    No reviews

    Indulge in the delightful Easy Spaghetti Pie, a fun and satisfying twist on traditional spaghetti that the whole family will love. This dish combines perfectly cooked spaghetti with colorful sautéed vegetables and a cheesy filling, all baked to golden perfection. Ideal for weeknight dinners or casual gatherings, you can customize it with your favorite ingredients or whatever you have on hand. Plus, it’s perfect for leftovers!

    • Author: Diana
    • Prep Time: 15 minutes
    • Cook Time: 30 minutes
    • Total Time: 45 minutes
    • Yield: Serves approximately 8
    • Category: Main
    • Method: Baking
    • Cuisine: Italian

    Ingredients

    Scale
    • 8 ounces spaghetti
    • 2 tablespoons olive oil
    • 1 medium onion, chopped
    • 3 garlic cloves, minced
    • 1 bell pepper, diced
    • 1 zucchini, diced
    • 1 teaspoon dried oregano
    • 1/2 teaspoon salt
    • 1/4 teaspoon black pepper
    • 1 cup marinara sauce
    • 2 cups shredded mozzarella cheese
    • 2 large eggs
    • 1/2 cup grated Parmesan cheese

    Instructions

    1. Cook the spaghetti in boiling water for about 8-10 minutes until al dente. Drain and set aside.
    2. In the same pot, heat olive oil over medium heat. Sauté the chopped onion for about 3-4 minutes until translucent.
    3. Add minced garlic, diced bell pepper, and zucchini to the pot; cook for another 5 minutes until tender.
    4. In a mixing bowl, combine drained spaghetti with sautéed vegetables. Mix in dried oregano, salt, black pepper, marinara sauce, and mozzarella cheese.
    5. Preheat your oven to 375°F (190°C) and grease a 9-inch pie dish. Pour the spaghetti mixture into the dish and press down gently.
    6. In a separate bowl, whisk together eggs with grated Parmesan cheese and pour it over the spaghetti mix.
    7. Bake in the preheated oven for about 25-30 minutes until golden brown on top.

    Nutrition

    • Serving Size: 1 slice (125g)
    • Calories: 290
    • Sugar: 4g
    • Sodium: 480mg
    • Fat: 14g
    • Saturated Fat: 6g
    • Unsaturated Fat: 6g
    • Trans Fat: 0g
    • Carbohydrates: 30g
    • Fiber: 2g
    • Protein: 12g
    • Cholesterol: 130mg

    Did you make this recipe?

    Share a photo and tag us — we can’t wait to see what you’ve made!

  • Mongolian Beef Noodles

    Mongolian Beef Noodles

    Mongolian Beef Noodles are a delightful dish that brings together tender beef and flavorful noodles in a savory sauce. This recipe is perfect for family dinners, gatherings, or quick weeknight meals. The combination of textures and tastes makes it a standout choice, ensuring you satisfy everyone at the table.

    Why You’ll Love This Recipe

    • Quick to Prepare: This dish comes together in under 30 minutes, making it ideal for busy evenings.
    • Rich Flavor: The sauce combines sweet and savory notes that perfectly complement the beef and noodles.
    • Customizable: Feel free to add your favorite vegetables or adjust the spice level to suit your taste.
    • Family-Friendly: Kids and adults alike will enjoy this comforting meal that’s both delicious and filling.
    • Great Leftovers: This dish reheats well, making it perfect for meal prep or next-day lunches.

    Tools and Preparation

    Having the right tools can make cooking Mongolian Beef Noodles easier and more enjoyable. Here’s what you’ll need:

    Essential Tools and Equipment

    • Large skillet
    • Pot for boiling noodles
    • Cutting board
    • Sharp knife
    • Measuring cups and spoons

    Importance of Each Tool

    • Large skillet: Essential for sautéing the beef evenly without overcrowding.
    • Pot for boiling noodles: Ensures your noodles cook perfectly al dente before mixing them with the other ingredients.

    Ingredients

    For the Beef

    • 500g beef strips (such as flank steak)
    • 2 tablespoons vegetable oil

    For the Marinade

    • 1 tablespoon soy sauce
    • 1 tablespoon cornstarch
    • 1 teaspoon ginger paste
    • 1 teaspoon garlic paste

    For the Sauce

    • 3 tablespoons soy sauce
    • 2 tablespoons brown sugar
    • 1 tablespoon water
    • 1 teaspoon sesame oil

    For the Noodles

    • 250g egg noodles (or any noodle of choice)

    For Garnish (Optional)

    • 2 green onions, chopped
    • Sesame seeds to taste
    Mongolian

    How to Make Mongolian Beef Noodles

    Step 1: Prepare the Marinade

    1. In a bowl, combine 1 tablespoon soy sauce, 1 tablespoon cornstarch, 1 teaspoon ginger paste, and 1 teaspoon garlic paste.
    2. Add the beef strips to the marinade, ensuring they are fully coated. Let it sit for about 10 minutes while you prepare other ingredients.

    Step 2: Cook the Noodles

    1. Bring a pot of salted water to a boil.
    2. Add the 250g egg noodles, cooking according to package instructions until al dente. Drain and set aside.

    Step 3: Sauté the Beef

    1. Heat a large skillet over medium-high heat and add 2 tablespoons vegetable oil.
    2. Once hot, add the marinated beef strips in a single layer. Cook for about 3-4 minutes on each side until browned and cooked through.
    3. Remove the beef from the skillet and set aside.

    Step 4: Prepare the Sauce

    1. In the same skillet, combine 3 tablespoons soy sauce, 2 tablespoons brown sugar, 1 tablespoon water, and 1 teaspoon sesame oil.
    2. Stir well over medium heat until mixed thoroughly.

    Step 5: Combine Everything

    1. Add cooked noodles to the skillet with sauce, tossing them gently to coat.
    2. Finally, add back in the sautéed beef strips, mixing everything together for another minute on low heat.

    Step 6: Serve

    Garnish with chopped green onions and sesame seeds if desired. Serve warm and enjoy your delicious Mongolian Beef Noodles!

    How to Serve Mongolian Beef Noodles

    Mongolian Beef Noodles are a delightful dish that can be served in various ways to enhance the dining experience. Here are some serving suggestions to consider.

    Pair with Fresh Vegetables

    • Steamed Broccoli: Add a side of steamed broccoli for a healthy crunch.
    • Sautéed Bell Peppers: Brighten your plate with colorful sautéed bell peppers.
    • Cucumber Salad: A refreshing cucumber salad with rice vinegar complements the rich flavors.

    Garnish Ideas

    • Sesame Seeds: Sprinkle toasted sesame seeds on top for an added nutty flavor.
    • Chopped Green Onions: Finely chopped green onions add freshness and color to your dish.
    • Cilantro Leaves: Fresh cilantro brings an aromatic touch that enhances the overall taste.

    Serving Style

    • In Bowls: Serve the noodles in deep bowls for a cozy, hearty meal.
    • On Plates: Present them on flat plates for a more formal dining setting.

    How to Perfect Mongolian Beef Noodles

    To achieve the best flavor and texture in your Mongolian Beef Noodles, consider these helpful tips.

    • Use fresh ingredients: Always choose fresh vegetables and high-quality beef (about 1 pound) for an authentic taste.
    • Marinate properly: Allow your sliced beef to marinate in soy sauce (2 tablespoons) for at least 30 minutes to enhance its flavor.
    • Cook on high heat: Stir-frying over high heat ensures the beef remains tender while achieving a nice sear.
    • Add cornstarch: Toss your beef slices in 1 tablespoon of cornstarch before cooking; this helps create a crispy exterior.
    • Balance flavors: Adjust seasoning by adding more soy sauce or sugar if necessary, according to your taste preferences.
    • Serve immediately: For the best texture, serve your noodles right after cooking while they are still hot.
    Mongolian

    Best Side Dishes for Mongolian Beef Noodles

    Complement your Mongolian Beef Noodles with some delicious side dishes. Here are some great options that pair well.

    1. Fried Rice: A classic choice, fried rice made with 2 cups of cooked rice and vegetables offers a filling side.
    2. Spring Rolls: Crispy spring rolls filled with vegetables provide a crunchy contrast to the noodles.
    3. Egg Drop Soup: Light and flavorful, this soup is made with 4 cups of broth and beaten eggs for a comforting option.
    4. Garlic Bread: A warm slice of garlic bread adds a savory touch that balances the meal nicely.
    5. Asian Slaw: Made with shredded cabbage (2 cups) and carrots, this slaw adds freshness and crunch to your plate.
    6. Edamame Beans: Steamed edamame sprinkled with sea salt makes for a simple yet satisfying side.

    Common Mistakes to Avoid

    Mongolian Beef Noodles is a delightful dish, but it’s easy to make mistakes. Here are some common pitfalls to watch out for:

    • Misjudging the beef cut – Using the wrong cut of beef can lead to tough noodles. Stick to flank steak or sirloin for the best texture.
    • Overcooking the noodles – Cooking noodles too long can make them mushy. Boil them for only 4-5 minutes, then drain promptly.
    • Ignoring seasoning balance – Using too much soy sauce can overpower the dish. Limit it to 1/4 cup for optimal flavor.
    • Neglecting fresh ingredients – Using stale vegetables will ruin your dish. Always use fresh bell peppers and scallions for the best taste.
    • Skipping the marination step – Not marinating the beef leads to less flavorful meat. Marinate in 2 tablespoons of soy sauce for at least 15 minutes.

    Storage & Reheating Instructions

    Refrigerator Storage

    • Store leftover Mongolian Beef Noodles in an airtight container.
    • They will last up to 3 days in the refrigerator.

    Freezing Mongolian Beef Noodles

    • Freeze in a freezer-safe container or resealable bag.
    • They can be stored for up to 3 months in the freezer.

    Reheating Mongolian Beef Noodles

    • Oven – Preheat to 350°F (175°C) and bake covered for about 15-20 minutes until heated through.
    • Microwave – Heat in a microwave-safe container for 1-2 minutes, stirring halfway through.
    • Stovetop – Warm over medium heat in a skillet, adding a splash of water if needed to prevent sticking.
    Mongolian

    Frequently Asked Questions

    What ingredients do I need for Mongolian Beef Noodles?

    To make Mongolian Beef Noodles, you will need:
    – 8 ounces of egg noodles
    – 1 pound of flank steak
    – 1/4 cup of soy sauce
    – 2 tablespoons of brown sugar
    – 1 tablespoon of cornstarch
    – Fresh vegetables like bell peppers and scallions

    Can I customize my Mongolian Beef Noodles?

    Absolutely! You can add vegetables like broccoli or snap peas, or even adjust spices according to your taste preferences.

    How do I ensure my beef is tender?

    To keep your beef tender, slice it against the grain into thin strips and marinate it in soy sauce (about 2 tablespoons) before cooking.

    Is there a vegetarian option for Mongolian Beef Noodles?

    Yes! Substitute beef with tofu or tempeh, and use vegetable broth instead of soy sauce for added flavor.

    How spicy are Mongolian Beef Noodles?

    The spice level is generally mild, but you can add sliced chili peppers or a dash of chili flakes if you prefer more heat.

    Final Thoughts

    Mongolian Beef Noodles are not only delicious but also versatile. You can easily customize this dish with different proteins or vegetables based on your preference. Give it a try; it’s sure to become a favorite!

    Print

    Mongolian Beef Noodles

    5 Stars 4 Stars 3 Stars 2 Stars 1 Star

    No reviews

    Mongolian Beef Noodles are a quick and savory dish that seamlessly blends tender beef and flavorful noodles in a rich sauce. Perfect for busy weeknights or family gatherings, this meal balances sweet and savory notes to create a comforting experience that pleases both kids and adults. With just 30 minutes of prep, you can enjoy a delightful dinner that warms the heart and satisfies the appetite. Customize it with your favorite vegetables, making it versatile enough to suit everyone’s tastes.

    • Author: Diana
    • Prep Time: 10 minutes
    • Cook Time: 20 minutes
    • Total Time: 30 minutes
    • Yield: Serves approximately four people 1x
    • Category: Main
    • Method: Stir-frying
    • Cuisine: Asian

    Ingredients

    Scale
    • 500g beef strips (flank steak)
    • 2 tablespoons vegetable oil
    • 1 tablespoon soy sauce (for marinade)
    • 1 tablespoon cornstarch (for marinade)
    • 1 teaspoon ginger paste
    • 1 teaspoon garlic paste
    • 3 tablespoons soy sauce (for sauce)
    • 2 tablespoons brown sugar
    • 1 tablespoon water
    • 1 teaspoon sesame oil
    • 250g egg noodles
    • Optional garnishes: 2 green onions (chopped), sesame seeds

    Instructions

    1. Marinate the Beef: In a bowl, combine 1 tablespoon soy sauce, 1 tablespoon cornstarch, 1 teaspoon ginger paste, and 1 teaspoon garlic paste. Add the beef strips, ensuring they are well-coated. Let sit for about 10 minutes.
    2. Cook the Noodles: Boil salted water in a pot. Add 250g egg noodles and cook until al dente according to package instructions. Drain and set aside.
    3. Sauté the Beef: Heat a large skillet over medium-high heat with 2 tablespoons vegetable oil. Cook marinated beef strips for about 3-4 minutes on each side until browned. Remove from skillet.
    4. Prepare the Sauce: In the same skillet, mix together 3 tablespoons soy sauce, 2 tablespoons brown sugar, 1 tablespoon water, and 1 teaspoon sesame oil over medium heat until combined.
    5. Combine Everything: Toss cooked noodles in the skillet with the sauce, then add back in sautéed beef for another minute on low heat.
    6. Serve: Garnish with chopped green onions and sesame seeds if desired.

    Nutrition

    • Serving Size: Approximately one-fourth of the dish (about 300g)
    • Calories: 480
    • Sugar: 8g
    • Sodium: 930mg
    • Fat: 18g
    • Saturated Fat: 3g
    • Unsaturated Fat: 12g
    • Trans Fat: <0.5g
    • Carbohydrates: 58g
    • Fiber: 3g
    • Protein: 25g
    • Cholesterol: 70mg

    Did you make this recipe?

    Share a photo and tag us — we can’t wait to see what you’ve made!

  • Cajun Chicken Sloppy Joes

    Cajun Chicken Sloppy Joes

    Cajun Chicken Sloppy Joes are a delightful twist on the classic comfort food that brings a zing of flavor to any meal. Perfect for family dinners, casual gatherings, or game day, these sandwiches are hearty and packed with mouthwatering spices. The unique Cajun seasoning elevates the dish, making it a standout choice that is sure to impress your guests.

    Why You’ll Love This Recipe

    • Quick Preparation: These sloppy joes come together in just 30 minutes, making them ideal for busy weeknights.
    • Flavor Explosion: The blend of Cajun spices creates a vibrant taste that will have everyone coming back for seconds.
    • Customizable: Feel free to add your favorite toppings like cheese or pickles for an extra kick.
    • Kid-Friendly: The savory flavors are appealing to all ages, making it a family favorite.
    • Perfect for Any Occasion: Whether it’s a casual dinner or a party, these sandwiches fit right in.

    Tools and Preparation

    Before diving into this delicious recipe, gather your essential tools to ensure a smooth cooking experience.

    Essential Tools and Equipment

    • Large skillet
    • Wooden spoon
    • Measuring cups
    • Measuring spoons
    • Serving plates

    Importance of Each Tool

    • Large skillet: This is crucial for sautéing the chicken and mixing in the flavorful sauce evenly.
    • Wooden spoon: A sturdy wooden spoon helps you stir ingredients without damaging your cookware.

    Ingredients

    For the Chicken

    • 500g ground chicken
    • 1 tablespoon olive oil
    • 1 medium onion, finely chopped
    • 4 garlic cloves, minced
    • 1 green bell pepper, diced

    For the Sauce

    • 1 cup tomato sauce
    • 2 tablespoons Worcestershire sauce (non-alcoholic)
    • 1 tablespoon hot sauce (adjust to taste)
    • 2 teaspoons Cajun seasoning
    • 1 teaspoon brown sugar

    For Serving

    • 4 hamburger buns
    • 1/2 cup shredded lettuce
    • 1/2 cup sliced tomatoes
    Cajun

    How to Make Cajun Chicken Sloppy Joes

    Step 1: Cook the Chicken

    1. Heat 1 tablespoon olive oil in a large skillet over medium heat.
    2. Add the 500g ground chicken, breaking it apart with a wooden spoon. Cook until browned and no longer pink, about 5-7 minutes.

    Step 2: Sauté Vegetables

    1. Stir in the 1 medium onion, 4 minced garlic cloves, and 1 diced green bell pepper.
    2. Cook until the vegetables soften, about 3-4 minutes.

    Step 3: Prepare the Sauce

    1. Add 1 cup tomato sauce, 2 tablespoons Worcestershire sauce, 1 tablespoon hot sauce, 2 teaspoons Cajun seasoning, and 1 teaspoon brown sugar.
    2. Mix well and let it simmer for about 10 minutes on low heat.

    Step 4: Assemble the Sloppy Joes

    1. Spoon the chicken mixture onto each of the 4 hamburger buns.
    2. Top with shredded lettuce and sliced tomatoes before serving.

    Enjoy your flavorful Cajun Chicken Sloppy Joes!

    How to Serve Cajun Chicken Sloppy Joes

    Cajun Chicken Sloppy Joes are a flavorful twist on the classic dish, perfect for any casual meal. Here are some great serving suggestions to enhance your dining experience.

    On a Fresh Bun

    • Choose soft hamburger buns or brioche for a delightful texture that complements the spicy filling.

    With Extra Toppings

    • Add sliced jalapeños or pickles for an added crunch and heat that pairs perfectly with the Cajun flavors.

    Accompanied by Coleslaw

    • Serve with a side of creamy coleslaw to balance the spices. The coolness of coleslaw offers a refreshing contrast.

    As a Lettuce Wrap

    • For a low-carb option, serve the mixture in large lettuce leaves. This is great for those looking to skip bread.

    Topped with Cheese

    • Melt some cheddar or pepper jack cheese over the top while it’s still hot for an extra layer of flavor.

    How to Perfect Cajun Chicken Sloppy Joes

    Making Cajun Chicken Sloppy Joes can be simple if you keep these tips in mind.

    • Use fresh ingredients: Fresh bell peppers, onions, and garlic (1 cup chopped each) will make your sloppy joes taste vibrant and delicious.
    • Adjust spice levels: If you prefer milder flavors, reduce the Cajun seasoning to 1 tablespoon instead of 2.
    • Simmer longer: Allow the mixture to simmer for at least 10 minutes after adding in the chicken (1 pound shredded) to let flavors meld beautifully.
    • Choose quality chicken: Opt for organic ground chicken for better flavor and texture in your sloppy joes.
    • Experiment with toppings: Different cheeses (like pepper jack) can add unique flavors when melted on top.
    • Serve immediately: For the best experience, serve your sloppy joes right after cooking them for maximum freshness and warmth.
    Cajun

    Best Side Dishes for Cajun Chicken Sloppy Joes

    Pairing side dishes with your Cajun Chicken Sloppy Joes can elevate your meal. Here are some excellent options to consider.

    1. Sweet Potato Fries: Crispy and sweet, they provide a nice contrast to the spicy chicken mix.
    2. Corn on the Cob: Grilled or boiled, corn adds sweetness and is easy to prepare alongside your sloppy joes.
    3. Potato Salad: A creamy potato salad (about 2 cups) complements the spices well while providing a hearty side.
    4. Mixed Green Salad: A simple green salad with vinaigrette can cleanse your palate between bites.
    5. Baked Beans: Sweet and smoky baked beans pair wonderfully with the zesty flavors of Cajun chicken.
    6. Macaroni and Cheese: Creamy mac and cheese is always a hit, making for a comforting side dish option.

    Common Mistakes to Avoid

    Making Cajun Chicken Sloppy Joes can be simple, but there are a few common pitfalls to watch out for.

    • Using too much spice – Limit Cajun seasoning to 2 tablespoons to avoid overwhelming flavors.
    • Not cooking the chicken thoroughly – Ensure the chicken reaches an internal temperature of 165°F for safety.
    • Overcooking the sauce – Simmer for no more than 10 minutes to prevent it from becoming too thick and losing flavor.
    • Skipping the toppings – Don’t forget to add fresh toppings like chopped cilantro or diced onions for extra flavor and texture.
    • Using stale buns – Fresh hamburger buns are key; choose soft ones for the best experience.

    Storage & Reheating Instructions

    Refrigerator Storage

    • Store Cajun Chicken Sloppy Joes in an airtight container.
    • Consume within 3-4 days for optimal freshness.

    Freezing Cajun Chicken Sloppy Joes

    • Use freezer-safe containers or bags to store portions.
    • They can be frozen for up to 3 months without losing flavor.

    Reheating Cajun Chicken Sloppy Joes

    • Oven – Preheat to 350°F and bake for about 15-20 minutes until heated through.
    • Microwave – Heat on medium power in a microwave-safe container for 1-2 minutes, stirring halfway through.
    • Stovetop – Warm over medium heat in a pan, stirring occasionally until hot, about 5-7 minutes.
    Cajun

    Frequently Asked Questions

    What can I serve with Cajun Chicken Sloppy Joes?

    You can serve these delicious sloppy joes with sweet potato fries, coleslaw, or a simple green salad for a complete meal.

    Can I use other meats instead of chicken?

    Yes, you can substitute ground turkey or beef. Just ensure that the meat is cooked thoroughly before adding other ingredients.

    How spicy are Cajun Chicken Sloppy Joes?

    The spice level depends on the amount of Cajun seasoning used. Start with 1 tablespoon and adjust according to your taste preferences.

    Can I make this recipe ahead of time?

    Absolutely! You can prepare the mixture in advance and store it in the refrigerator for up to 3 days before serving.

    Final Thoughts

    Cajun Chicken Sloppy Joes offer a delightful twist on a classic dish. Their rich flavors and versatility make them perfect for any meal. Feel free to customize with your favorite toppings or spices!

    Print

    Cajun Chicken Sloppy Joes

    5 Stars 4 Stars 3 Stars 2 Stars 1 Star

    No reviews

    Cajun Chicken Sloppy Joes are a vibrant spin on the beloved classic, delivering a delightful kick of flavor that transforms any meal. This quick and easy recipe is perfect for busy weeknights, family gatherings, or game day feasts. Tender ground chicken is sautéed with fresh vegetables and coated in a zesty Cajun-spiced sauce, all served on soft hamburger buns. Topped with crisp lettuce and succulent tomatoes, these sloppy joes promise a satisfying bite every time. Get ready to impress your family and friends with this bold and delicious dish that’s sure to be a hit!

    • Author: Diana
    • Prep Time: 10 minutes
    • Cook Time: 20 minutes
    • Total Time: 30 minutes
    • Yield: Serves 4
    • Category: Lunch & Dinner
    • Method: Sautéing
    • Cuisine: Cajun

    Ingredients

    Scale
    • 500g ground chicken
    • 1 tablespoon olive oil
    • 1 medium onion, finely chopped
    • 4 garlic cloves, minced
    • 1 green bell pepper, diced
    • 1 cup tomato sauce
    • 2 tablespoons Worcestershire sauce (non-alcoholic)
    • 1 tablespoon hot sauce (adjust to taste)
    • 2 teaspoons Cajun seasoning
    • 1 teaspoon brown sugar
    • 4 hamburger buns
    • 1/2 cup shredded lettuce
    • 1/2 cup sliced tomatoes

    Instructions

    1. Heat the olive oil in a large skillet over medium heat. Add the ground chicken and cook until browned (5-7 minutes).
    2. Stir in the chopped onion, minced garlic, and diced bell pepper. Sauté until softened (3-4 minutes).
    3. Add the tomato sauce, Worcestershire sauce, hot sauce, Cajun seasoning, and brown sugar. Mix well and let simmer on low heat for about 10 minutes.
    4. Spoon the mixture onto each hamburger bun and top with shredded lettuce and sliced tomatoes.

    Nutrition

    • Serving Size: 1 sandwich
    • Calories: 372
    • Sugar: 6g
    • Sodium: 850mg
    • Fat: 16g
    • Saturated Fat: 3g
    • Unsaturated Fat: 11g
    • Trans Fat: 0g
    • Carbohydrates: 34g
    • Fiber: 2g
    • Protein: 26g
    • Cholesterol: 80mg

    Did you make this recipe?

    Share a photo and tag us — we can’t wait to see what you’ve made!

  • Boston Cream Pie Cheesecake

    Boston Cream Pie Cheesecake

    Boston Cream Pie Cheesecake is a delightful fusion of classic flavors that works beautifully for any occasion, from birthdays to holiday gatherings. This dessert combines the rich creaminess of cheesecake with the luscious chocolate and vanilla components of a Boston cream pie. Its unique texture and taste make it a standout choice that will impress your guests and satisfy your sweet tooth.

    Why You’ll Love This Recipe

    • Delicious Flavor Combination: The blend of creamy cheesecake, vanilla custard, and chocolate ganache creates an irresistible taste.
    • Eye-Catching Presentation: With its glossy chocolate topping and layered look, this cheesecake is sure to wow at any gathering.
    • Versatile Dessert: Perfect for celebrations or as an everyday treat, this cheesecake fits various occasions effortlessly.
    • Easy to Make: With simple steps and accessible ingredients, you can whip up this dessert without stress.
    • Make-Ahead Friendly: Prepare it in advance and let it chill, making entertaining a breeze.

    Tools and Preparation

    To create the perfect Boston Cream Pie Cheesecake, you’ll need some essential tools. Having the right equipment on hand will streamline your preparation.

    Essential Tools and Equipment

    • 9-inch springform pan
    • Mixing bowls
    • Electric mixer
    • Rubber spatula
    • Saucepan
    • Whisk

    Importance of Each Tool

    • 9-inch springform pan: This allows for easy removal of the cheesecake, keeping its shape intact for presentation.
    • Electric mixer: Quickly blends ingredients to achieve a smooth texture, which is crucial for cheesecakes.
    • Rubber spatula: Perfect for scraping down sides of bowls and folding ingredients without losing air.

    Ingredients

    For the Crust

    • 1 ½ cups graham cracker crumbs
    • ½ cup unsalted butter, melted
    • ¼ cup granulated sugar

    For the Cheesecake Filling

    • 24 ounces cream cheese, softened
    • ¾ cup granulated sugar
    • 1 teaspoon vanilla extract
    • 3 large eggs

    For the Vanilla Custard

    • 1 ¾ cups whole milk
    • ¼ cup granulated sugar
    • 2 tablespoons cornstarch
    • 1 teaspoon vanilla extract
    • 2 large egg yolks

    For the Chocolate Ganache Topping

    • 1 cup semi-sweet chocolate chips
    • ½ cup heavy cream
    Boston

    How to Make Boston Cream Pie Cheesecake

    Step 1: Prepare the Crust

    1. Preheat your oven to 350°F (175°C).
    2. In a mixing bowl, combine 1 ½ cups graham cracker crumbs, ½ cup melted unsalted butter, and ¼ cup granulated sugar. Mix until well combined.
    3. Press the mixture firmly into the bottom of a 9-inch springform pan to form an even layer.
    4. Bake in preheated oven for 10 minutes. Remove and let cool completely.

    Step 2: Make the Cheesecake Filling

    1. In a large mixing bowl, beat together 24 ounces softened cream cheese, ¾ cup granulated sugar, and 1 teaspoon vanilla extract until smooth using an electric mixer.
    2. Add in the eggs one at a time, mixing well after each addition until fully incorporated.
    3. Pour the cheesecake filling over the cooled crust in the springform pan.

    Step 3: Bake the Cheesecake

    1. Bake in the oven at 325°F (163°C) for about 50-60 minutes or until set but still slightly jiggly in the center.
    2. Turn off the oven and leave the cheesecake inside with the door ajar for about 1 hour.
    3. Remove from oven and let it cool completely on a wire rack before refrigerating.

    Step 4: Prepare Vanilla Custard

    1. In a saucepan over medium heat, whisk together 1 ¾ cups whole milk, ¼ cup granulated sugar, and 2 tablespoons cornstarch. Cook until thickened while stirring continuously.
    2. Remove from heat; add in 1 teaspoon vanilla extract, then whisk in two beaten egg yolks until smooth.

    Step 5: Assemble and Top with Ganache

    1. Once cooled, spread the vanilla custard evenly over the chilled cheesecake.
    2. In another saucepan, heat ½ cup heavy cream. Once hot, remove from heat and add in 1 cup semi-sweet chocolate chips. Stir until melted and smooth.
    3. Pour chocolate ganache over custard layer on cheesecake evenly.

    Step 6: Chill and Serve

    1. Refrigerate for at least four hours or overnight before serving.
    2. Carefully remove from springform pan before slicing into pieces.

    Enjoy your homemade Boston Cream Pie Cheesecake!

    How to Serve Boston Cream Pie Cheesecake

    Serving Boston Cream Pie Cheesecake is all about enhancing its rich flavors and creamy texture. Here are some delightful suggestions to elevate your dessert experience.

    Classic Presentation

    • Chilled Slices: Serve slices straight from the fridge for a refreshing taste.
    • With Whipped Cream: Add a dollop of whipped cream on top for extra sweetness and creaminess.

    Pair with Fruits

    • Fresh Berries: Strawberries or raspberries add a tart contrast that balances the sweetness.
    • Banana Slices: Layering banana slices can provide a lovely texture and flavor combination.

    Complementary Sauces

    • Chocolate Sauce Drizzle: A drizzle of warm chocolate sauce enhances the chocolate flavor.
    • Caramel Sauce: A light caramel drizzle can add an earthy sweetness to the cheesecake.

    How to Perfect Boston Cream Pie Cheesecake

    To create the ultimate Boston Cream Pie Cheesecake, keep these tips in mind for perfect results.

    • Use Room Temperature Ingredients: Start with room temperature cream cheese (24 ounces) and eggs (3 large) for a smoother batter.
    • Bake in a Water Bath: Place your cheesecake pan in a larger pan filled with hot water to prevent cracks during baking.
    • Cool Gradually: Allow the cheesecake to cool in the oven with the door ajar for at least 1 hour before refrigerating.
    • Chill Overnight: For the best flavor and texture, refrigerate your cheesecake overnight before serving.
    Boston

    Best Side Dishes for Boston Cream Pie Cheesecake

    Pairing side dishes with your Boston Cream Pie Cheesecake can create a delightful meal experience. Here are some tasty options.

    1. Coffee: A warm cup of coffee complements the sweetness and richness of the cheesecake perfectly.
    2. Vanilla Ice Cream: The creamy texture of vanilla ice cream pairs well, especially when slightly melted over the cheesecake.
    3. Chocolate Covered Strawberries: These add an elegant touch and enhance the chocolate flavors in the cheesecake.
    4. Fruit Salad: A light fruit salad with melons, grapes, and citrus can offer a refreshing contrast.
    5. Nutty Biscotti: Crunchy biscotti can provide an interesting texture that complements creamy desserts like cheesecake.
    6. Cheese Platter: Include mild cheeses like brie or mascarpone to balance out the dessert’s sweetness.

    Common Mistakes to Avoid

    Avoiding common mistakes can elevate your Boston Cream Pie Cheesecake to the next level. Here are some pitfalls to watch for:

    • Using the wrong cream – Opt for heavy cream (at least 36% fat) instead of lighter creams for a rich filling.
    • Overmixing the batter – Mix just until combined; overmixing can lead to a dense texture.
    • Not chilling adequately – Allow at least 4 hours in the fridge before serving to ensure proper setting.
    • Skipping the ganache – The chocolate ganache is essential for flavor; don’t skip it or use low-quality chocolate.
    • Incorrect baking time – Ensure you bake for about 60 minutes, checking doneness with a toothpick.

    Storage & Reheating Instructions

    Refrigerator Storage

    • Store in an airtight container to keep it fresh.
    • Consume within 5 days for best quality.

    Freezing Boston Cream Pie Cheesecake

    • Wrap individual slices in plastic wrap and then place in a freezer bag.
    • Store for up to 3 months. Thaw overnight in the refrigerator before serving.

    Reheating Boston Cream Pie Cheesecake

    • Oven – Preheat to 350°F (175°C) and heat slices for about 10-15 minutes.
    • Microwave – Heat on medium power for 30-second intervals until warm.
    • Stovetop – Place slices in a pan over low heat, cover, and warm gently.
    Boston

    Frequently Asked Questions

    What is Boston Cream Pie Cheesecake?

    Boston Cream Pie Cheesecake is a delightful dessert that combines creamy cheesecake with layers of chocolate ganache and vanilla custard, all on a buttery crust.

    Can I use a store-bought crust?

    Yes, you can use a store-bought graham cracker crust. However, making your own from 1 ½ cups of crushed graham crackers mixed with ½ cup melted butter enhances flavor.

    How long does Boston Cream Pie Cheesecake last?

    When properly stored in the refrigerator, it lasts about 5 days. For longer preservation, freeze it for up to 3 months.

    Can I customize the flavors?

    Absolutely! You can add different extracts like almond or hazelnut, or try using different types of chocolate for the ganache.

    What should I serve with Boston Cream Pie Cheesecake?

    Serving with fresh berries or whipped cream adds freshness and contrast to this rich dessert.

    Final Thoughts

    Boston Cream Pie Cheesecake is an irresistible blend of textures and flavors. Its creamy filling paired with chocolate ganache makes it perfect for any occasion. Feel free to customize the recipe by adding your favorite flavors or toppings. Try making it today!

    Print

    Boston Cream Pie Cheesecake

    5 Stars 4 Stars 3 Stars 2 Stars 1 Star

    No reviews

    Indulge in the decadence of Boston Cream Pie Cheesecake, a delightful fusion of creamy cheesecake, rich chocolate ganache, and velvety vanilla custard. Perfect for celebrations or everyday treats, this dessert features a buttery graham cracker crust that adds a satisfying crunch. With its stunning presentation and irresistible flavor combination, this cheesecake is sure to impress your guests and satisfy your sweet cravings. Easy to make ahead and serve, you’ll find yourself reaching for another slice!

    • Author: Diana
    • Prep Time: 30 minutes
    • Cook Time: 70 minutes
    • Total Time: 1 hour 40 minutes
    • Yield: Serves approximately twelve people
    • Category: Dessert
    • Method: Baking
    • Cuisine: American

    Ingredients

    Scale
    • 1 ½ cups graham cracker crumbs
    • ½ cup unsalted butter, melted
    • ¼ cup granulated sugar
    • 24 ounces cream cheese, softened
    • ¾ cup granulated sugar
    • 1 teaspoon vanilla extract
    • 3 large eggs
    • 1 ¾ cups whole milk
    • ¼ cup granulated sugar
    • 2 tablespoons cornstarch
    • 1 teaspoon vanilla extract
    • 2 large egg yolks
    • 1 cup semi-sweet chocolate chips
    • ½ cup heavy cream

    Instructions

    1. Preheat oven to 350°F (175°C). In a mixing bowl, combine graham cracker crumbs, melted butter, and sugar. Press into the bottom of a springform pan and bake for 10 minutes. Cool completely.
    2. In a large bowl, beat cream cheese, sugar, and vanilla until smooth. Add eggs one at a time until fully incorporated. Pour over the cooled crust.
    3. Bake at 325°F (163°C) for about 50–60 minutes until set but jiggly in the center. Cool in the oven with the door ajar for 1 hour before refrigerating.
    4. For the custard: Whisk milk, sugar, cornstarch over medium heat until thickened; stir in vanilla and egg yolks.
    5. Spread custard over chilled cheesecake. Melt heavy cream and chocolate chips together for ganache; pour over custard.
    6. Chill for at least four hours or overnight before serving.

    Nutrition

    • Serving Size: 1 slice (130g)
    • Calories: 430
    • Sugar: 30g
    • Sodium: 320mg
    • Fat: 30g
    • Saturated Fat: 17g
    • Unsaturated Fat: 10g
    • Trans Fat: 0g
    • Carbohydrates: 37g
    • Fiber: <1g
    • Protein: 7g
    • Cholesterol: 120mg

    Did you make this recipe?

    Share a photo and tag us — we can’t wait to see what you’ve made!