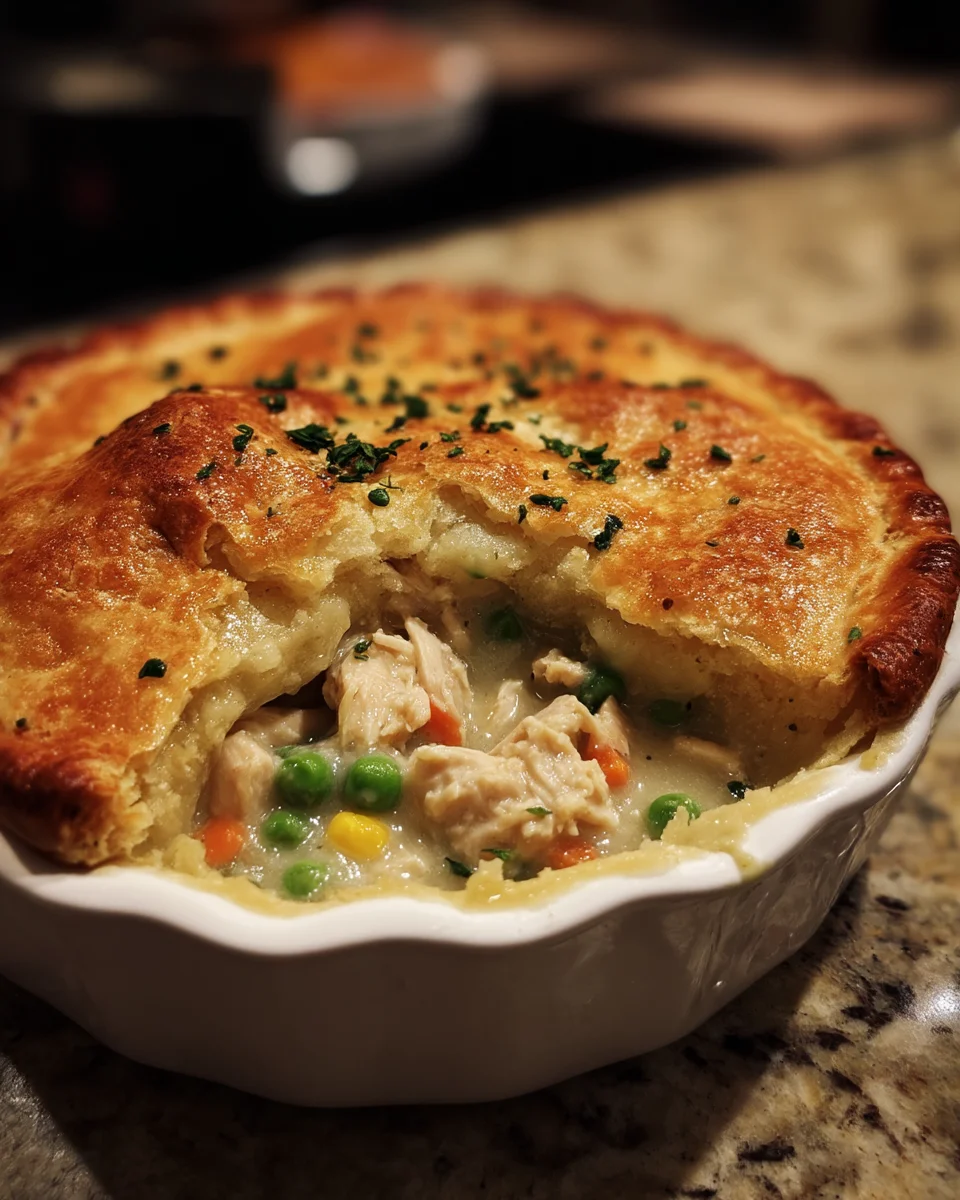
Bisquick Chicken Pot Pie is a comforting dish that brings together the warmth of home-cooked meals with the convenience of quick preparation. Perfect for family dinners or gatherings, this recipe stands out for its ease of preparation and delightful flavor. With a rich filling and a fluffy Bisquick topping, it’s sure to please everyone at the table.
Why You’ll Love This Recipe
- Quick and Easy: This recipe comes together in about 30 minutes, making it perfect for busy weeknights.
- Delicious Comfort Food: Enjoy a classic pot pie that is both hearty and satisfying, ideal for chilly evenings.
- Versatile Ingredients: Feel free to customize the filling with your favorite vegetables or protein options.
- Family-Friendly: Kids and adults alike will love the creamy chicken mixture topped with a golden crust.
Tools and Preparation
Gathering the right tools will help you make this dish effortlessly. Here’s what you’ll need:
Essential Tools and Equipment
- 9-inch pie pan
- Mixing bowl
- Whisk
- Cooking spoon
- Oven mitts
Importance of Each Tool
- 9-inch pie pan: This is essential for holding your pot pie while it bakes to golden perfection.
- Mixing bowl: A large mixing bowl is necessary for combining your ingredients evenly.
- Whisk: Use a whisk to ensure that all ingredients are well-blended, especially when preparing the filling.
Ingredients
For the Filling
- 2 cups cooked shredded chicken
- 1 cup frozen mixed vegetables (peas, carrots, corn)
- 1/2 cup milk
- 1 can (10.5 ounces) cream of chicken soup
- 1 teaspoon garlic powder
- Salt and black pepper to taste
For the Topping
- 1 1/2 cups Bisquick mix
- 3/4 cup milk
- 3 large eggs
How to Make Bisquick Chicken Pot Pie
Step 1: Prepare the Filling
- In a mixing bowl, combine 2 cups cooked shredded chicken, 1 cup frozen mixed vegetables, 1/2 cup milk, and 1 can cream of chicken soup.
- Add in 1 teaspoon garlic powder, along with salt and black pepper to taste. Mix until well combined.
Step 2: Assemble the Pie
- Pour the filling mixture into a greased 9-inch pie pan, spreading it evenly across the base.
Step 3: Make the Topping
- In another bowl, whisk together 1 1/2 cups Bisquick mix, 3/4 cup milk, and 3 large eggs. Ensure there are no lumps in the batter.
Step 4: Bake
- Pour the Bisquick topping over the filling in the pie pan.
- Bake in a preheated oven at 400°F (200°C) for about 30 minutes or until the top is golden brown.
Enjoy your delicious homemade Bisquick Chicken Pot Pie!
How to Serve Bisquick Chicken Pot Pie
Serving Bisquick Chicken Pot Pie can elevate your dining experience. This comforting dish pairs well with various sides and garnishes that enhance its flavors.
Classic Pairings
- Green Salad: A fresh green salad with mixed greens, cherry tomatoes, and a light vinaigrette balances the richness of the pot pie.
- Garlic Bread: Warm garlic bread made with 1 loaf of French bread, butter, and minced garlic offers a crunchy contrast to the soft pie.
Additional Toppings
- Chopped Fresh Herbs: Sprinkle chopped parsley or thyme on top for a burst of freshness.
- Grated Cheese: Add shredded cheddar cheese (about 1 cup) on top before baking for an extra cheesy flavor.
Seasonal Variations
- Cranberry Sauce: A small side of cranberry sauce complements the savory flavors with a hint of sweetness, especially during fall.
- Steamed Vegetables: Serve steamed broccoli or carrots seasoned with a pinch of salt to add color and nutrients to your meal.
How to Perfect Bisquick Chicken Pot Pie
To perfect your Bisquick Chicken Pot Pie, consider these helpful tips. They will ensure your dish is delicious every time you make it.
- Use cooked chicken: Start with about 2 cups of shredded rotisserie chicken for a faster prep time and great flavor.
- Add veggies: Incorporate 1 cup of frozen mixed vegetables or 1 cup of diced fresh vegetables like carrots and peas for added texture.
- Season well: Don’t forget to season your filling with 1 teaspoon of salt and ½ teaspoon of black pepper for optimal taste.
- Adjust baking time: Keep an eye on the pie while baking; it should be golden brown on top after about 30 minutes at 400°F (200°C).
- Let it cool slightly: Allow the pot pie to rest for about 10 minutes after baking. This helps the filling set and makes serving easier.
- Experiment with spices: Try adding a pinch of paprika or cayenne pepper (¼ teaspoon) for extra warmth in your filling.
Best Side Dishes for Bisquick Chicken Pot Pie
Choosing the right side dishes can make your meal even more enjoyable. Here are some excellent options that pair nicely with Bisquick Chicken Pot Pie.
- Mashed Potatoes: Creamy mashed potatoes made from 4 large potatoes, butter, and cream provide a hearty side that complements the pie’s flavors.
- Coleslaw: A refreshing coleslaw made from 4 cups of shredded cabbage and carrots tossed in a tangy dressing adds crunch to your plate.
- Corn on the Cob: Boil or grill fresh corn on the cob (about 4 ears) for a sweet and juicy addition to your meal.
- Roasted Brussels Sprouts: Toss halved Brussels sprouts (about 1 pound) in olive oil, salt, and pepper, then roast until crispy for a nutritious side.
- Baked Beans: Sweet baked beans provide a comforting contrast; use about 2 cups from a can or homemade recipe.
- Fruit Salad: A light fruit salad made from berries and melon adds a refreshing touch; mix around 2 cups total for balance.
Common Mistakes to Avoid
Making Bisquick Chicken Pot Pie can be simple, but there are common mistakes that can ruin the dish. Here are some pitfalls to watch out for:
- Using too much chicken – While chicken is essential, using more than 2 cups may overwhelm the other flavors.
- Neglecting seasoning – Forgetting to add salt can make your pot pie bland. Aim for about 1 teaspoon of salt for balance.
- Overmixing the batter – Mix the Bisquick batter just until combined; overmixing can lead to a tough crust.
- Skipping the vegetables – Leaving out vegetables like carrots (1 cup diced) or peas (1 cup) will reduce flavor and nutrition.
- Not pre-cooking chicken – Using raw chicken can lead to uneven cooking. Always use 2 cups of cooked, shredded chicken.
Storage & Reheating Instructions
Refrigerator Storage
- Store leftover Bisquick Chicken Pot Pie in an airtight container for up to 3 days.
- Allow the dish to cool completely before sealing it in a container.
Freezing Bisquick Chicken Pot Pie
- Freeze individual portions or whole pies wrapped tightly in plastic wrap and then aluminum foil.
- It can last in the freezer for up to 3 months.
Reheating Bisquick Chicken Pot Pie
- Oven – Preheat to 350°F (175°C) and bake for about 20-25 minutes or until heated through.
- Microwave – Heat on high for 2-3 minutes, checking every minute until hot.
- Stovetop – Place in a skillet over medium heat, cover, and cook for about 10 minutes, stirring occasionally.
Frequently Asked Questions
What is Bisquick Chicken Pot Pie?
Bisquick Chicken Pot Pie is a quick and easy dish made with cooked chicken, vegetables, and a simple Bisquick batter that forms a flaky crust when baked.
Can I use frozen vegetables in Bisquick Chicken Pot Pie?
Yes! You can substitute fresh vegetables with about 2 cups of frozen mixed vegetables. Just thaw them before adding them to the mixture.
How do I make Bisquick Chicken Pot Pie gluten-free?
To make this recipe gluten-free, use a gluten-free Bisquick mix and ensure all other ingredients are gluten-free.
How long does it take to bake Bisquick Chicken Pot Pie?
The baking time is typically around 30 minutes at 400°F (200°C), or until the top is golden brown and cooked through.
Can I customize my Bisquick Chicken Pot Pie?
Absolutely! Feel free to add herbs like thyme or rosemary, or swap out chicken for turkey or beef depending on your preference!
Final Thoughts
Bisquick Chicken Pot Pie is not only comforting but also versatile. You can easily customize it with your favorite proteins and veggies. Try this delicious recipe today for a fulfilling meal that’s sure to please everyone at your table!
Bisquick Chicken Pot Pie

Indulge in the comforting delight of Bisquick Chicken Pot Pie, a quick and hearty dish perfect for busy weeknights or family gatherings. This recipe combines tender shredded chicken and vibrant mixed vegetables enveloped in a creamy filling, all topped with a fluffy Bisquick crust that bakes to golden perfection. With minimal prep time and maximum flavor, you can enjoy a homemade meal that pleases both kids and adults alike. Customize it with your favorite veggies or proteins for an added twist.
- Prep Time: 10 minutes
- Cook Time: 30 minutes
- Total Time: 40 minutes
- Yield: Serves approximately 6
- Category: Main
- Method: Baking
- Cuisine: American
Ingredients
- 2 cups cooked shredded chicken
- 1 cup frozen mixed vegetables (peas, carrots, corn)
- 1/2 cup milk
- 1 can (10.5 ounces) cream of chicken soup
- 1 teaspoon garlic powder
- Salt and black pepper to taste
- 1 1/2 cups Bisquick mix
- 3/4 cup milk (for topping)
- 3 large eggs
Instructions
- Preheat your oven to 400°F (200°C).
- In a mixing bowl, combine the cooked shredded chicken, frozen mixed vegetables, 1/2 cup milk, cream of chicken soup, garlic powder, salt, and pepper. Mix well.
- Pour the filling into a greased 9-inch pie pan.
- In another bowl, whisk together the Bisquick mix, 3/4 cup milk, and eggs until smooth.
- Pour the Bisquick topping over the chicken filling in the pie pan.
- Bake for about 30 minutes or until the top is golden brown.
Nutrition
- Serving Size: 1 slice (approx. 200g)
- Calories: 320
- Sugar: 3g
- Sodium: 680mg
- Fat: 14g
- Saturated Fat: 4g
- Unsaturated Fat: 8g
- Trans Fat: 0g
- Carbohydrates: 36g
- Fiber: 2g
- Protein: 18g
- Cholesterol: 120mg
Leave a Reply